The Secret Science to Perfect Southern Fried Chicken Better Than Grandmas Recipe
There is something almost magical about the sound of a perfect crunch. That initial shatter of a golden, crusted exterior followed by the steam of a perfectly seasoned, juicy interior is the hallmark of legendary Southern comfort food. For generations, the secrets to achieving this balance were guarded like family heirlooms, whispered over cast iron skillets in humid kitchens. But today, we are pulling back the curtain. Achieving the ultimate fried chicken isn’t just about following a recipe; it is about understanding the simple science of heat, moisture, and starch. If you have ever struggled with a crust that falls off or chicken that is burnt on the outside while remaining raw at the bone, this guide is your roadmap to redemption.
The Foundation of Flavor: The Power of the Buttermilk Bath
Most home cooks skip the soaking process because they are in a hurry, but this is the single biggest mistake you can make. The buttermilk bath serves two critical scientific purposes that cannot be replicated by any other liquid. First, the mild acidity in buttermilk acts as a gentle tenderizer. Unlike harsh vinegars, the lactic acid breaks down the protein fibers in the chicken meat slowly, ensuring that even the thickest breast remains supple after hitting the hot oil.
Second, buttermilk provides a biological “glue” for your flour. The thick consistency of the cultured milk, combined with its natural proteins, creates a tacky surface that allows your seasoned flour to bond to the skin. When you let your chicken sit in this bath for at least one hour—or ideally overnight—you are not just flavoring the meat; you are building the foundation for a crust that stays attached to the chicken instead of sliding off in the pan.
Why Acidic Tenderizing Beats Mechanical Pounding
While some recipes suggest pounding chicken to a uniform thickness, this can often damage the delicate texture of the meat. By using the buttermilk method, you allow the chemistry of the acid to do the work for you. It penetrates deep into the tissue, ensuring that every bite is as tender as the last. For an extra kick, many Southern chefs add a splash of hot sauce or lemon juice to the bath, which further aids the breakdown of proteins while adding a subtle, underlying brightness to the finished dish.
The Shatter-Crisp Secret: Why Cornstarch is Non-Negotiable
If you have been using 100 percent all-purpose flour for your dredging, you have been missing out on a world of texture. The “trick everyone gets wrong” often lies in the ratio of the dry ingredients. To get that ultra-crispy, glass-like crunch, you must introduce cornstarch into your flour mixture. Flour contains gluten, which can become tough and bread-like when hydrated and fried. Cornstarch, on the other hand, is a pure starch that prevents gluten development and absorbs moisture more efficiently.
When the chicken hits the oil, the cornstarch creates millions of microscopic bubbles on the surface of the crust. These tiny air pockets are what create the “shatter” effect. As the water evaporates from the batter, these bubbles harden into a rigid, lace-like structure that stays crispy long after the chicken has left the heat. A ratio of 75 percent flour to 25 percent cornstarch is generally considered the sweet spot for a crust that is sturdy enough to hold flavor but light enough to crunch effortlessly.
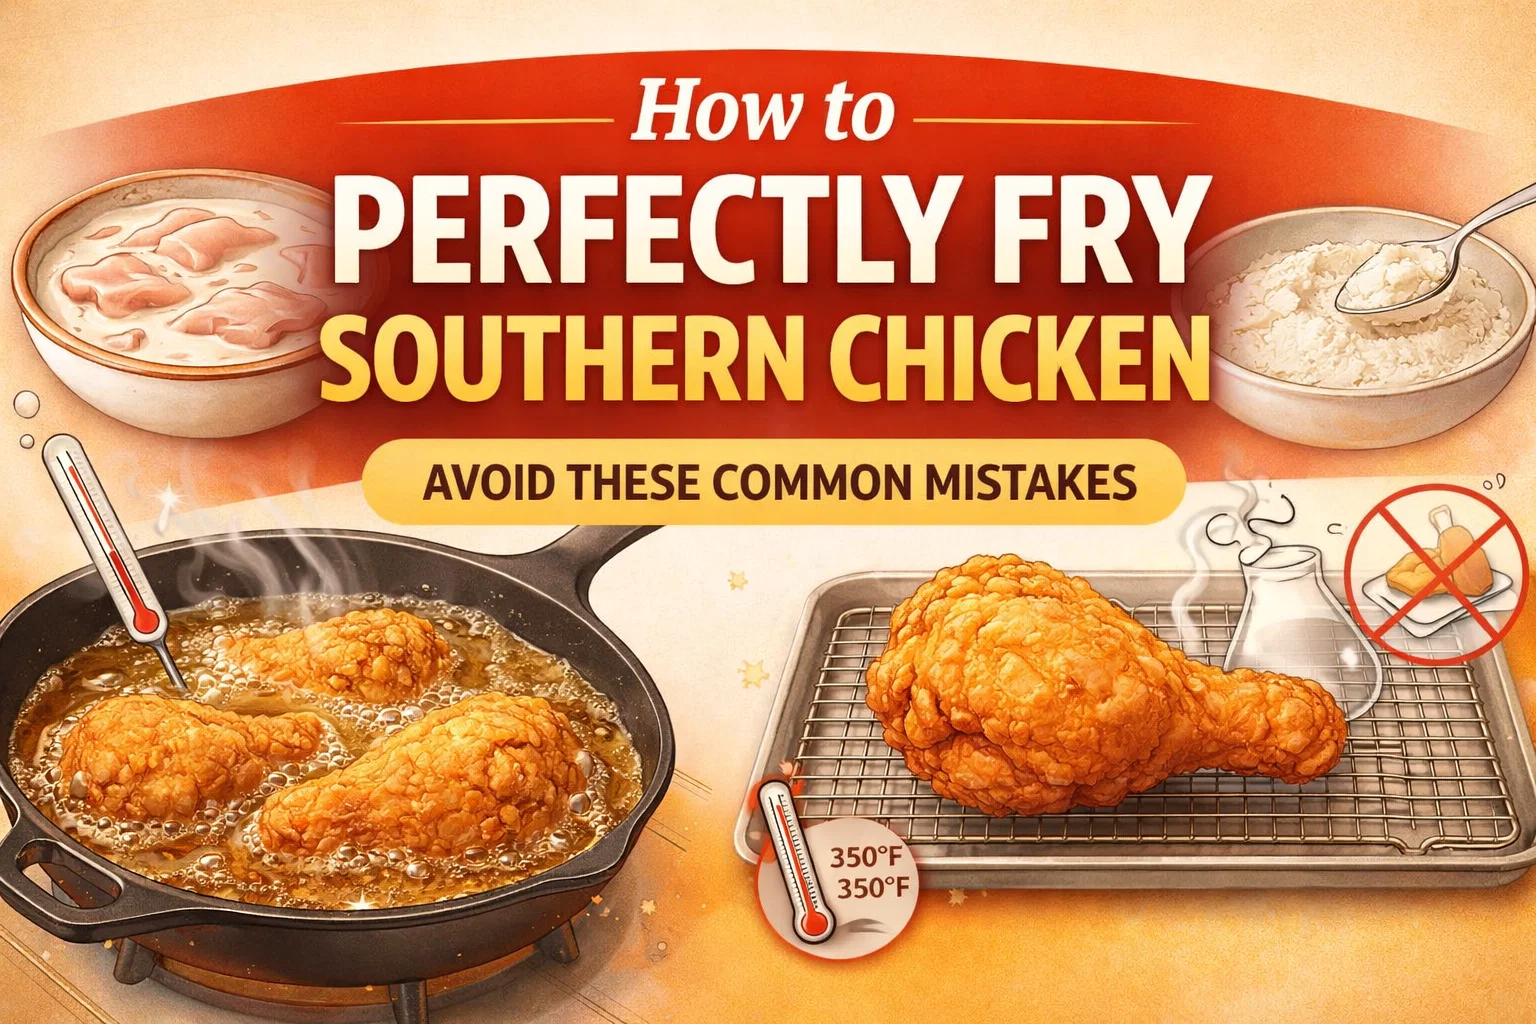
Mastering the Skillet: Oil Levels and Temperature Control
Deep frying is a common modern technique, but true Southern fried chicken is often born in a shallow cast iron skillet. The depth of your oil is a game-changer. By filling your pan only halfway up the side of the chicken pieces, you allow the top half of the meat to vent steam. This prevents the entire piece from being submerged in a high-pressure environment, which often leads to a soggy, oil-logged crust. Shallow frying allows for a more controlled, even cook and results in significantly less oil absorption.
The Danger Zones of Frying Temperatures
Success in frying is a game of degrees. You want to aim for a consistent temperature between 325 and 350 degrees Fahrenheit. If your oil is too hot, the outside of your chicken will turn a dark, bitter brown before the internal temperature reaches a safe 165 degrees. You end up with a “burnt-raw” disaster. Conversely, if your oil is too cool, the chicken will sit in the fat, soaking it up like a sponge. This results in greasy, heavy chicken that feels more like a chore to eat than a treat. Using a clip-on thermometer is the only way to guarantee professional results; never rely on guesswork when dealing with hot fat.
The Cooling Mistake That Ruins Everything
You have done the hard work. The chicken looks beautiful, golden, and smelling like heaven. Most people take the chicken out of the pan and place it directly onto a plate lined with paper towels. Stop right there. This is the fastest way to kill your crunch. When hot chicken sits on a flat surface, the heat trapped underneath creates steam. That steam has nowhere to go but back up into the crust, turning your hard-earned “shatter-crisp” into a mushy mess within minutes.
The solution is simple: use a wire cooling rack. By elevating the chicken, you allow air to circulate around the entire piece. This allows the steam to escape freely into the kitchen rather than being trapped against the meat. Five minutes on a wire rack is the secret to a long-lasting crisp that stays crunchy even after the chicken has cooled down to eating temperature. This step is the difference between a meal that is good for five minutes and a meal that stays delicious until the last bite.
The Science Summary: Why This Method Works
To understand why this method is superior, we have to look at the synergy of the steps. The buttermilk provides the moisture and the bond. The cornstarch provides the structural integrity of the crust. The temperature control ensures the fat renders out while the juices stay in. Finally, the cooling rack preserves the physical state of the crust. It is a chain reaction of culinary physics. When one link is missing, the quality of the final product drops significantly. By following this scientific approach, you aren’t just cooking; you are engineering a sensory experience.
- Acidity: Breaks down tough proteins for a melt-in-your-mouth texture.
- Starch Science: Prevents gluten toughness and creates air pockets for maximum crunch.
- Controlled Frying: Balances the Maillard reaction (browning) with internal doneness.
- Airflow: Prevents the condensation of steam from softening the exterior.
Elevating Your Seasoning Game
While the technique is the skeleton of the recipe, the seasoning is the soul. Don’t be afraid to be aggressive with your spices. Since much of the seasoning will be lost in the frying process or diluted by the flour, your buttermilk bath and your flour dredge should be heavily seasoned. Salt is a given, but black pepper, cayenne, garlic powder, and onion powder are the “big four” of Southern frying. Some even swear by a pinch of MSG or a dash of smoked paprika to add depth and that elusive umami quality that keeps people coming back for seconds.
Timing Your Dredge
Another pro tip is to let your chicken rest for about ten minutes after dredging it in the flour but before putting it in the oil. This gives the flour and cornstarch time to fully hydrate and form a cohesive paste around the chicken. This “set” time ensures that the breading stays firmly attached to the meat when it hits the bubbling oil, preventing those unsightly bald spots on your fried chicken.
Conclusion: Bringing the Tradition Home
Southern fried chicken is more than just a dish; it is a labor of love that represents hospitality and home. While it might seem intimidating to master the “perfect crunch,” understanding the science behind the buttermilk, the cornstarch, and the cooling process removes the mystery. You don’t need a secret family recipe passed down through five generations to create something spectacular. You simply need a bit of patience, a trusty cast iron skillet, and the willingness to respect the physics of the fry.
The next time you prepare to fry a batch of chicken, remember that every step serves a purpose. From the hour-long soak to the careful monitoring of the thermometer, these details are what separate the amateurs from the masters. Put these techniques to the test in your own kitchen and watch as your friends and family marvel at the most juicy, crispy, and flavorful chicken they have ever tasted. It is time to stop guessing and start frying with confidence. Your perfect Sunday dinner is just a skillet away.