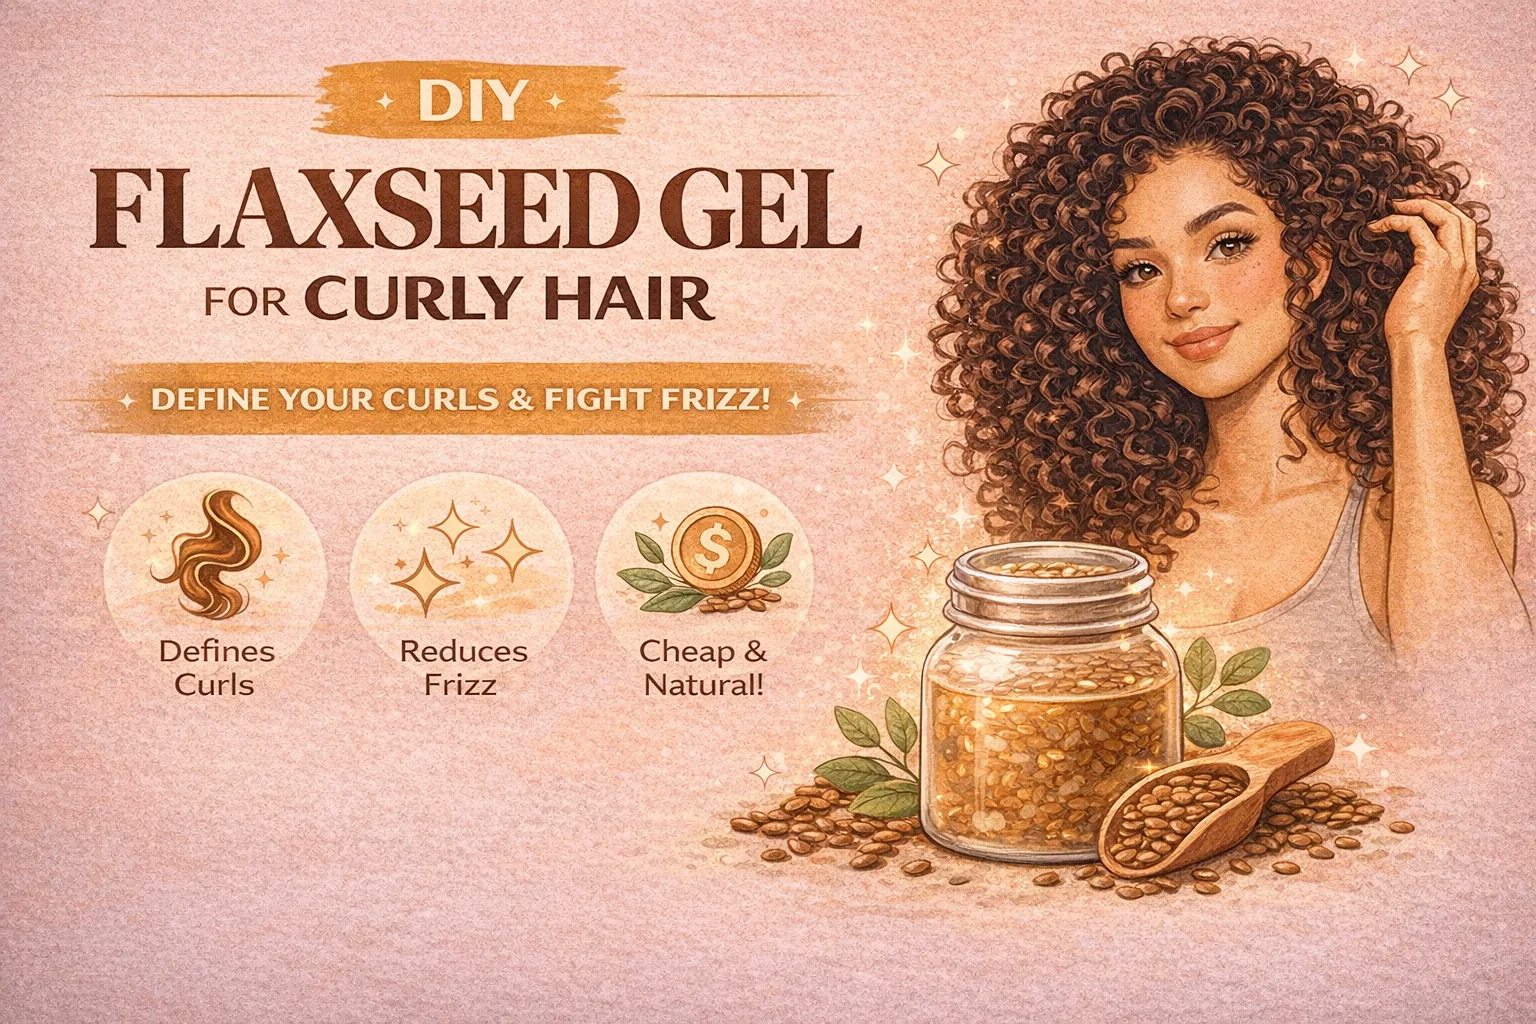
DIY Flaxseed Gel Mask for Curly Hair Define Curls Reduce Frizz Naturally
Finding the perfect balance for curly hair often feels like an endless quest for a holy grail product. Many of us have spent a fortune on high-end creams and serums only to find our hair weighed down, crunchy, or still prone to an afternoon halo of frizz. However, the secret to bouncy, defined, and healthy curls might not be sitting on a department store shelf but rather in your kitchen pantry. Flaxseed gel has become a sensation in the natural hair community for its incredible ability to define patterns while providing a boost of nutrition that synthetic products simply cannot match.
The image we are looking at highlights a simple, three-step process to create a homemade flaxseed gel mask. This DIY remedy is more than just a trend. It is a functional, protein-rich treatment that bridges the gap between a styling product and a deep conditioner. By utilizing the natural mucilage found in flaxseeds, you can achieve a soft hold that respects the delicate nature of curls, coils, and waves. Let’s dive deep into why this humble seed is a game-changer for your hair care routine and how you can master the art of the flaxseed mask at home.
The Science of Flaxseeds for Hair Health
To understand why flaxseed gel works so well, we have to look at the nutritional profile of the seeds themselves. Flaxseeds are one of the richest plant-based sources of Omega-3 fatty acids, specifically alpha-linolenic acid. When you simmer these seeds, they release a thick, gel-like substance that is loaded with nutrients. When applied to the hair, these fats help to seal the cuticle and provide much-needed moisture to the hair shaft.
Beyond fatty acids, flaxseeds are rich in Vitamin E. This antioxidant plays a crucial role in scalp health by reducing oxidative stress and improving blood circulation. A healthy scalp is the foundation for hair growth, and by using a flaxseed mask, you are essentially feeding your follicles. This is why many users report not just better styling results, but also stronger hair and less breakage over time. Unlike commercial gels that often contain drying alcohols, flaxseed gel is a humectant, meaning it helps your hair retain moisture throughout the day.
Why Curls Love This Natural Mask
Curly hair is uniquely structured, which makes it more susceptible to dryness. Because of the twists and turns in the hair fiber, natural oils from the scalp have a harder time traveling down to the ends. This is where flaxseed gel steps in as a protector and a hydrator. Here are the primary reasons why curly-haired individuals are making the switch to this DIY mask:
- Weightless Definition: Many curly products rely on heavy oils or silicones that can make hair look greasy or flat. Flaxseed gel provides a “film-forming” layer that defines the curl shape without the weight.
- Frizz Reduction: By smoothing the outer layer of the hair, the gel prevents moisture from the air from entering the hair shaft and causing it to puff up.
- Natural Shine: The nutrient-dense gel adds a light-reflecting quality to the hair, making curls look vibrant and healthy rather than dull.
- Cost-Effectiveness: As the image suggests, this method is incredibly cheap. A single bag of flaxseeds can provide months worth of hair treatments for a fraction of the cost of one salon bottle.
Step by Step Guide to Making Your Flaxseed Gel
The process shown in the visual is straightforward, but there are a few professional tips that can help you get the perfect consistency every time. If the gel is too thin, it won’t provide enough hold. If it is too thick, it becomes difficult to strain and apply.
1. The Simmering Phase
Start with 1/4 cup of whole brown or golden flaxseeds and 2 cups of filtered water. Place them in a small saucepan and bring the mixture to a boil. Once it starts bubbling, turn the heat down to a medium simmer. You will need to stir often to prevent the seeds from sticking to the bottom of the pan. As the seeds cook, you will notice the water transforming into a consistency similar to egg whites. This usually takes about 5 to 10 minutes. Watch for the moment when a slight foam appears on top, as that is your cue that the gel is ready.
2. Straining for Smoothness
This is the most critical step. You must strain the mixture while it is still warm. Once the gel cools, it thickens significantly, making it almost impossible to separate the seeds from the liquid. Use a fine-mesh strainer or, for the best results, a clean pantyhose or a nut milk bag. Pour the mixture into the cloth or strainer over a glass jar. If using a cloth, use tongs to squeeze the gel through so you do not burn your hands. What remains in your jar is a pure, golden elixir for your hair.
3. Cooling and Storage
Allow the gel to cool completely before you put a lid on the jar. Because this is a fresh, natural product without synthetic preservatives, it does have a limited shelf life. A jar of flaxseed gel will typically stay fresh in the refrigerator for one to two weeks. You can extend this by adding a few drops of Vitamin E oil or an essential oil like rosemary or lavender, which also provides a lovely scent and additional scalp benefits.
How to Apply the Mask for Maximum Results
Application is just as important as the recipe. To get the results described in the image, such as “soft and lightweight” curls, you should apply the gel to damp hair. Many people prefer using it as a pre-wash treatment or a “mask” as the infographic suggests. In this case, you would coat your hair from root to tip, let it sit for 20 to 30 minutes, and then proceed with your usual wash routine.
However, you can also use this as a leave-in styling gel. If you choose this route, apply it using the “praying hands” method to smooth the gel over your curls, then scrunch upward to encourage the natural pattern. Once your hair is dry, you might feel a slight “cast” or stiffness. This is a good sign! Simply “scrunch out the crunch” with a tiny bit of oil on your hands to reveal incredibly soft, bouncy curls that hold their shape all day.
Customizing Your Flaxseed Experience
One of the best things about DIY hair care is that you can tailor the formula to your specific hair needs. Not all curls are created equal, and your flaxseed gel doesn’t have to be either. If you have very high-porosity hair that drinks up moisture, you might want to whisk in a teaspoon of organic honey or agave nectar into the warm gel for extra humectant properties. This helps the hair hold onto water even longer.
For those struggling with hair thinning or slow growth, adding essential oils during the cooling phase is a brilliant move. Peppermint oil can stimulate the scalp and provide a refreshing tingle, while cedarwood can help balance the oil-producing glands in the scalp. If your hair is particularly dry, blending in a teaspoon of jojoba or almond oil once the gel has cooled will give the mask a more emollient, creamy texture that provides extra nourishment.
Comparing Homemade Gel to Commercial Products
It is worth noting why so many people are ditching store-bought options in favor of the recipe shown in the image. Most commercial gels contain polymers and PVP/VA copolymers. While these are effective at holding hair in place, they are essentially plastics that coat the hair. Over time, these can build up, leading to a loss of shine and a feeling of “heaviness” that requires harsh clarifying shampoos to remove.
Flaxseed gel is entirely water-soluble. It rinses away easily, meaning you won’t suffer from the dreaded “product buildup” that often plagues the curly hair community. Furthermore, it is a “clean” beauty option. There are no parabens, no sulfates, and no artificial fragrances. For someone with a sensitive scalp or those who are eco-conscious, this is a sustainable and ethical choice that yields professional-grade results.
Common Mistakes to Avoid
While the process is simple, beginners often run into a few hurdles. The most common mistake is boiling the seeds for too long. If the gel becomes too thick, like a heavy jelly, it will be very difficult to distribute evenly through your hair and might leave small flakes when it dries. Always aim for a consistency that is liquid enough to pour but thick enough to have some “stretch” to it.
Another tip is to make sure your hair is properly detangled before application. Because the gel provides hold, applying it to tangled hair will “set” those tangles in place. Use a wide-tooth comb or your fingers to smooth your hair while it is wet and conditioned, then apply the flaxseed gel to ensure every strand is coated and defined.
Final Thoughts on the Flaxseed Revolution
Embracing your natural curls is a journey of discovery, and sometimes the best solutions are the ones that have been used for generations. The flaxseed gel mask is a testament to the power of simple, natural ingredients. It offers a way to define and enhance your hair’s natural beauty without relying on harsh chemicals or expensive marketing. By following the “Simmer, Strain, Cool” method, you take control of your hair care routine and give your curls exactly what they need: moisture, strength, and a frizz-free finish.
Whether you are a seasoned “curly girl” or just starting to explore your natural texture, this flaxseed mask is a low-risk, high-reward experiment. It is a moment of self-care that results in hair that feels as good as it looks. So, the next time you find yourself frustrated with frizz, head to the kitchen instead of the beauty aisle. Your curls will thank you for the nourishment and the gorgeous, natural hold that only flaxseeds can provide.