DIY Headache Relief Balm Recipe Natural Herbal Remedy for Tension
If you have ever felt the thumping pressure of a tension headache starting to creep up behind your eyes, you know exactly how desperate that search for relief can become. In our fast paced world of screen glare and constant stress, headaches have become an all too common companion. While over the counter pills are a quick fix, more and more people are looking toward the wisdom of the earth for a gentler, more holistic approach. That is where the magic of a homemade Headache Relief Balm comes into play. This simple, three ingredient DIY project allows you to harness the power of aromatherapy and topical soothing to manage discomfort naturally. By creating your own salve, you know exactly what is going into your body, avoiding synthetic fragrances and harsh chemicals while focusing on the healing properties of plants.
The Shift Toward Natural Headache Management
The modern wellness movement is less about rejecting medicine and more about embracing complementary alternatives that work with your body. For many, a headache is a signal that the nervous system is overwhelmed. Applying a cooling, aromatic balm is not just about the active ingredients; it is a ritual of self care. The act of pausing, breathing in the scent of peppermint, and massaging your temples creates a sensory break that helps the body shift from a state of stress into a state of recovery. This balm is designed to be your pocket sized sanctuary, ready to provide a cooling tingle and a moment of peace whenever life gets a bit too loud.
Why DIY Topical Balms Work
You might wonder how a simple balm can rival a pill. The secret lies in the transdermal absorption of essential oils and the power of inhalation. When you apply a balm to your temples or the base of your neck, the essential oils penetrate the skin to provide localized relief. Simultaneously, the volatile compounds in the oils travel through the olfactory system directly to the brain, helping to relax tight muscles and soothe the mind. It is a multi sensory approach to pain management that addresses both the physical sensation and the emotional stress that often accompanies a headache.
Breaking Down the Essential Ingredients
The beauty of this recipe lies in its simplicity. You do not need a chemistry degree to create a professional grade healing salve. Each ingredient in this Headache Relief Balm serves a specific purpose, ensuring the final product is stable, easy to apply, and highly effective. Let us take a closer look at what makes this recipe a powerhouse for natural healing.
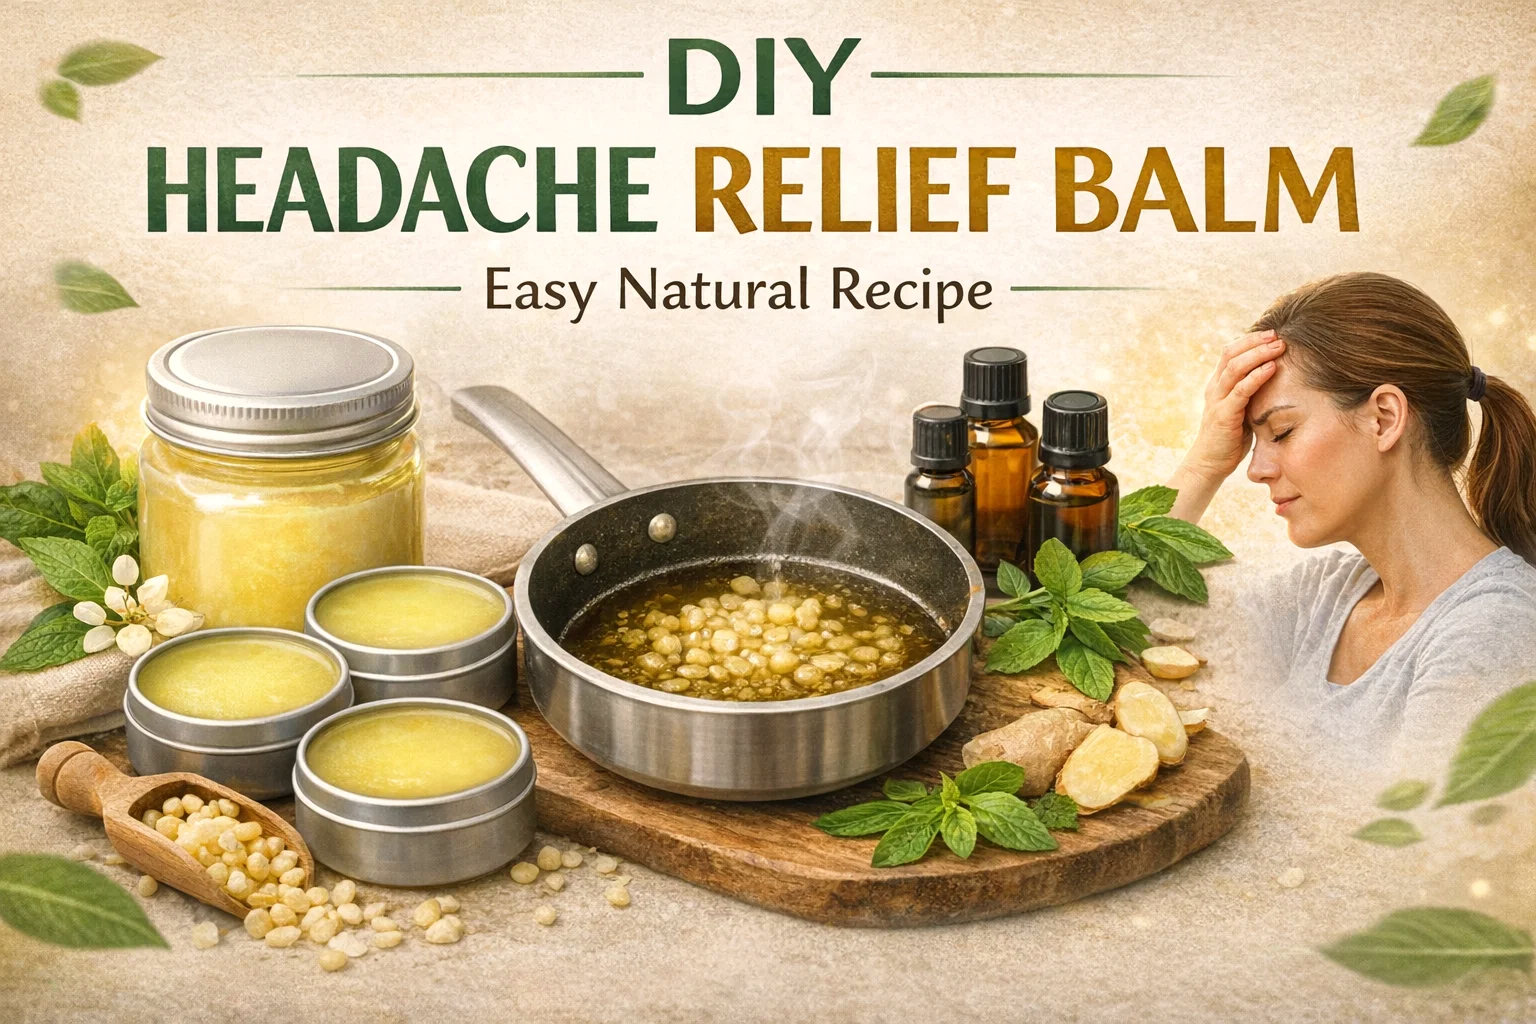
Beeswax Pellets: The Protective Base
Beeswax is the skeleton of your balm. It provides the firm structure that keeps the oils in a solid state at room temperature. Beyond its structural role, beeswax is a natural humectant, meaning it helps draw moisture into the skin. It creates a breathable barrier that protects the skin while allowing the essential oils to be absorbed slowly over time. When sourcing your beeswax, look for yellow or white pellets (also called pastilles) because they melt quickly and evenly, ensuring a smooth texture without any gritty bits.
Carrier Oils: The Delivery System
Essential oils are far too potent to be applied directly to the skin in high concentrations. This is where carrier oils come in. For this recipe, coconut oil or sweet almond oil are the top choices. Coconut oil is fantastic because it has a slight cooling effect and stays semi solid at cooler temperatures, adding to the balm’s consistency. Sweet almond oil is rich in Vitamin E and is incredibly lightweight, making it perfect for those who want a non greasy finish. These oils “carry” the medicinal essential oils into your skin safely while nourishing the tissue.
The Power of Essential Oils
The true “medicine” in this balm comes from the essential oils. The most common trio for headache relief includes:
- Peppermint Oil: Contains menthol, which helps muscles relax and eases pain. It provides that signature “cooling” sensation that can distract the brain from pain signals.
- Lavender Oil: Renowned for its sedative properties, lavender is perfect for tension headaches caused by stress or anxiety. It helps calm the nervous system.
- Eucalyptus Oil: This is especially helpful for sinus headaches. It acts as a decongestant and has anti inflammatory properties that can open up the airways and reduce pressure.
Step by Step Guide to Making Your Headache Balm
Creating this balm is a quick process that feels like a kitchen science experiment. The total active time is less than fifteen minutes, yet you will end up with enough balm to last for months. Follow these steps carefully to ensure a perfect, creamy consistency every time.
Step 1: Melting the Wax
Start by placing one tablespoon of beeswax pellets into a small saucepan or a double boiler. If you do not have a double boiler, you can place a glass bowl over a pot of simmering water. Use low heat. It is vital not to rush this process; overheating beeswax can ruin its beneficial properties. Stir gently until the pellets have completely transformed into a clear, golden liquid.
Step 2: Combining with Carrier Oils
Once the wax is liquid, add two tablespoons of your chosen carrier oil. Whether you choose the tropical scent of coconut oil or the neutral feel of sweet almond oil, stir it into the melted wax. You will notice the mixture might cloud up slightly as the cooler oil meets the hot wax. Keep stirring over low heat until the mixture is completely transparent and combined. This ensures your balm will not separate once it cools.
Step 3: The Fragrant Infusion
Remove the pan from the heat entirely. This is a crucial step. Essential oils are volatile, meaning they evaporate and lose their potency if they are added to liquid that is boiling hot. Let the mixture sit for about thirty seconds, then add your two teaspoons of essential oils. You can use a single oil or a blend of peppermint and lavender for a balanced effect. Stir quickly to distribute the oils evenly before the wax begins to set.
Step 4: Pouring and Setting
Carefully pour the liquid gold into small metal tins or glass jars. Small two ounce tins are perfect because they are portable and easy to open. Fill them almost to the top, leaving just a tiny bit of room for the lid. Now comes the hardest part: patience. Leave the tins undisturbed on a flat surface. As they cool, the liquid will turn opaque and solidify into a smooth, buttery balm. This usually takes about thirty to sixty minutes depending on the temperature of your kitchen.
Advanced Customizations for Your Salve
Once you have mastered the basic recipe, you can start to customize your balm to suit your specific needs. Herbalism is a personal journey, and your balm should reflect what your body responds to best.
Adding Vitamin E for Longevity
If you want your balm to last a long time, consider adding a few drops of Vitamin E oil during step three. Vitamin E acts as a natural antioxidant, preventing the carrier oils from going rancid over time. It also adds an extra layer of skin healing benefits, making the balm even more nourishing for your forehead and temples.
Infusing with Dried Herbs
For a truly potent herbal remedy, you can infuse your carrier oil with dried herbs like Feverfew or Ginger before starting the balm making process. Feverfew has been used for centuries as a traditional treatment for migraines. Simply steep the dried herbs in your carrier oil on very low heat for an hour, strain the herbs out, and then proceed with the recipe using your newly “medicated” oil.
How to Use Your Relief Balm Effectively
Having the balm is only half the battle; knowing how to apply it can make a significant difference in how quickly you find relief. The goal is to target the areas where tension naturally accumulates in the body.
Targeting the Temples and Forehead
At the first sign of a headache, take a small pea sized amount of balm and rub it between your index fingers to warm it up. Massage it into your temples using slow, circular motions. Be careful to avoid the eye area, as the peppermint oil can be quite sharp and cause stinging if it gets too close to your eyes. The cooling sensation will begin almost immediately, providing a soothing distraction from the internal pressure.
The Neck and Shoulders Connection
Many headaches actually start in the neck and shoulders. If you spend your day hunched over a laptop, your suboccipital muscles (at the base of your skull) are likely extremely tight. Apply a generous amount of balm to the back of your neck and massage upward toward the hairline. This helps to increase blood flow and relax the muscles that are pulling on your scalp and causing pain.
Storage and Shelf Life Tips
To keep your DIY Headache Relief Balm fresh and potent, storage is key. Since this is a natural product without synthetic preservatives, it is sensitive to its environment. Keep your tins in a cool, dry place away from direct sunlight. High heat will cause the balm to melt and potentially leak, while sunlight can degrade the essential oils. When stored correctly, your balm should remain effective for six to twelve months. If you notice the scent fading significantly or the oil smelling “off,” it is time to whip up a fresh batch.
Why Choosing Homemade Matters
In a world of mass produced goods, there is something deeply empowering about making your own remedies. It connects you to the ingredients and gives you control over your health. When you use this balm, you aren’t just applying a product; you are using a tool you crafted with your own hands to care for yourself. It is a sustainable, affordable, and effective way to manage one of life’s most common nuisances. Plus, these little tins make incredible gifts for friends and family who are looking to transition to a more natural lifestyle.
Whether you are a seasoned herbalist or a total beginner to the world of DIY, this Headache Relief Balm is a rewarding project. It proves that nature often provides exactly what we need to find balance and comfort. So, the next time the world feels a little too heavy and your head starts to ache, reach for your homemade balm, take a deep breath, and let the plants do their work.
Would you like me to generate a list of the best carrier oils for different skin types to go along with this post?