DIY Homemade Vapor Rub Recipe Natural Relief with Essential Oils
There is something deeply comforting about the scent of eucalyptus and peppermint when you are feeling under the weather. For many of us, that clinical, store-bought vapor rub was a childhood staple, smeared on chests and feet at the first sign of a sniffle. But as we transition toward a more mindful, holistic lifestyle, we start to look closer at the ingredients in those blue plastic jars. Often, they are packed with petroleum-based jellies and synthetic fragrances that do not always align with a natural wellness philosophy. That is where the magic of a homemade vapor rub comes into play. By combining rich, skin-nourishing butters with the concentrated power of essential oils, you can create a potent, plant-based remedy that supports your respiratory system and your skin at the same time.
The Shift Toward Natural Respiratory Support
The modern wellness movement is not just a trend; it is a return to our roots. People are increasingly seeking ways to manage their health using ingredients they can actually pronounce. When it comes to respiratory support, the goal is to open the airways, soothe irritation, and provide a sense of calm during the physical stress of being sick. Traditional over the counter rubs often rely heavily on petrolatum. While it creates a barrier, it does not offer the therapeutic benefits that plant-based fats like shea butter and coconut oil provide. Making your own version allows you to control the potency and ensures that every single drop serves a purpose for your healing process.
Why Shea Butter and Coconut Oil are the Perfect Base
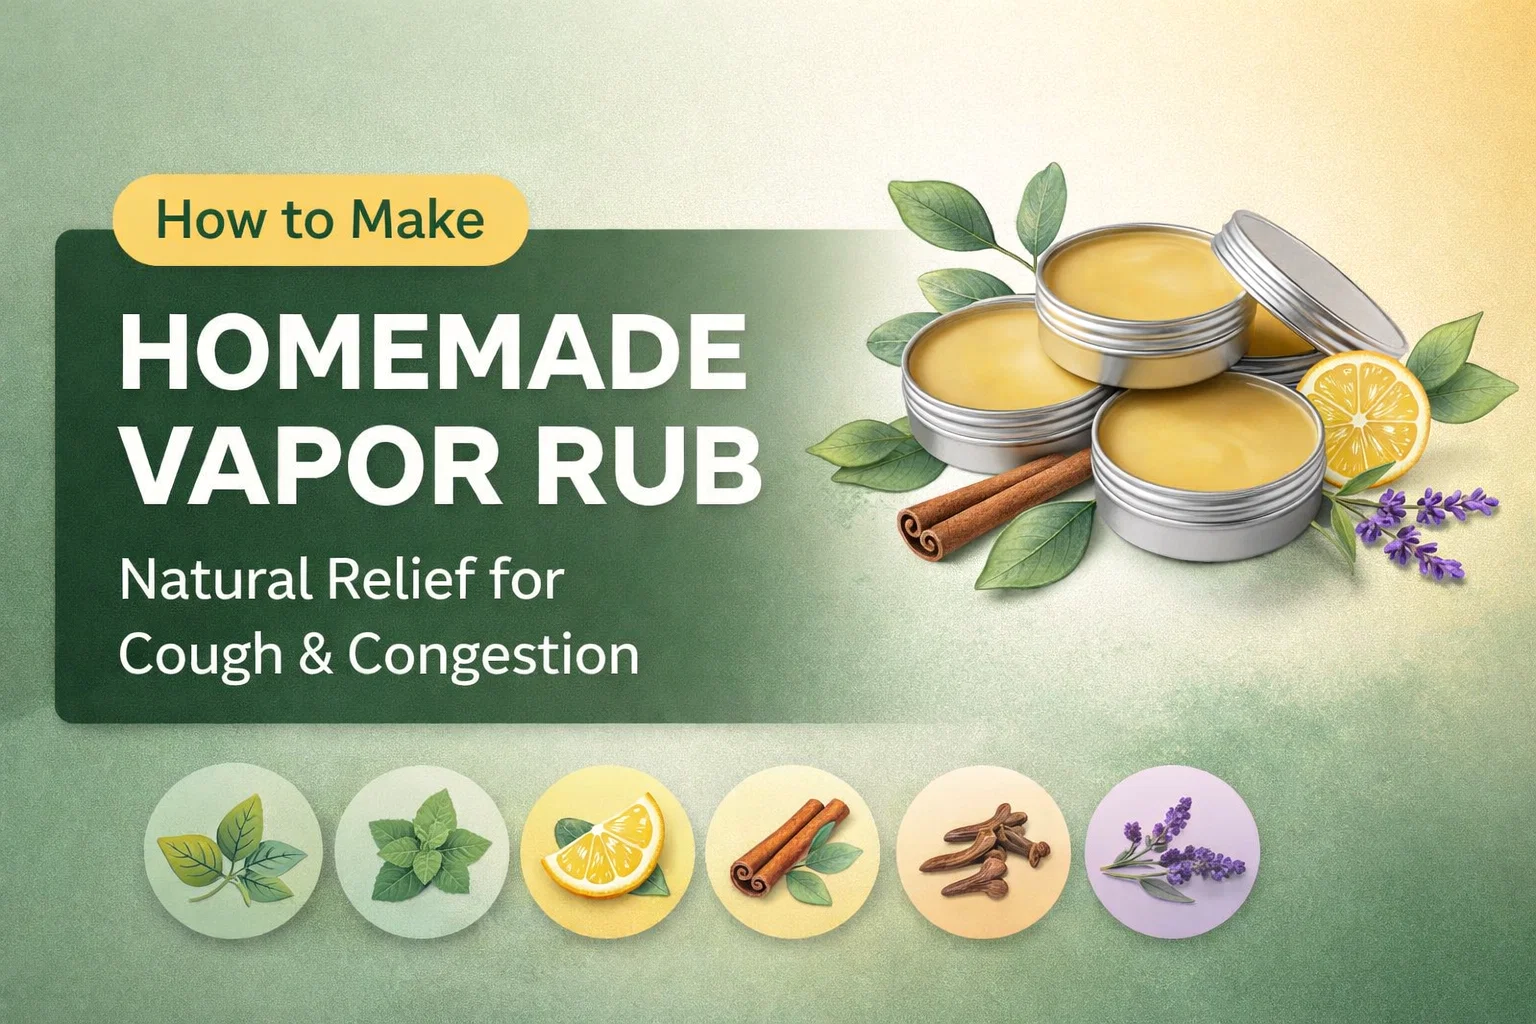
In this recipe, we use a 1/4 cup of shea butter and a 1/4 cup of coconut oil as the foundation. Shea butter is incredibly dense in vitamins and fatty acids, making it deeply moisturizing for skin that might be irritated from constant tissue use. Coconut oil acts as an excellent carrier because it has a relatively low melting point, allowing the rub to glide onto the skin effortlessly. More importantly, coconut oil has inherent antimicrobial properties that offer a subtle layer of protection. When you melt these together with two tablespoons of beeswax, you get a consistency that is firm in the jar but melts instantly upon contact with your skin, releasing the aromatic vapors exactly where you need them.
Deconstructing the Essential Oil Blend
The true power of this homemade vapor rub lies in the synergy of the essential oils. Each oil selected for this recipe plays a specific role, ranging from physical decongestion to emotional relaxation. By understanding what each oil contributes, you can appreciate why this blend is so much more effective than a single-note scent. Let us break down the heavy hitters in this “breathe easy” concoction.
Eucalyptus and Peppermint: The Dynamic Decongestants
Eucalyptus is perhaps the most famous respiratory oil in the world. It contains a compound called eucalyptol, which is known for its ability to break up mucus and reduce inflammation in the lungs. In this recipe, ten drops of eucalyptus work to physically open up the airways. Peppermint acts as its perfect partner. The menthol in peppermint provides that cooling sensation that can make a feverish chest feel instantly better. It acts as a natural expectorant, helping you to clear out the junk so you can breathe deeply again. Together, these two create the “vapor” effect that defines a high quality chest rub.
The Protective Power of Frankincense and Lemon
Frankincense is often referred to as the king of oils, and for good reason. It is highly regarded for its ability to support overall cellular health and reduce the body’s inflammatory response. Adding ten drops of frankincense elevates this rub from a simple decongestant to a total wellness balm. Lemon oil, on the other hand, brings a bright, cleansing energy to the mix. It is packed with antioxidants and is a staple for immune support. When you are congested, the refreshing scent of lemon also helps to cut through the heavy, medicinal aroma of the other oils, making the rub much more pleasant to wear throughout the day.
Immune Boosting with Cinnamon, Clove, and Lavender
Cinnamon and clove are warm, spicy oils that are legendary for their ability to fight off environmental threats. They provide a gentle warming sensation when applied to the skin, which can help increase circulation to the chest area. This increased blood flow helps the body’s natural defenses work more efficiently. Finally, we add a few drops of lavender. While the other oils are busy fighting congestion and supporting the immune system, lavender focuses on the mind. Being sick is exhausting and stressful. Lavender promotes the relaxation necessary for deep, restorative sleep, which is ultimately the best medicine for any ailment.
Step by Step Guide to Crafting Your Vapor Rub
Creating this remedy is a simple process that feels like a beautiful ritual of self-care. You will want to use a double boiler method to ensure that you do not burn the delicate fats. If you do not have a double boiler, you can simply place a glass measuring cup inside a pot of simmering water. This indirect heat is the best way to preserve the integrity of the shea butter and coconut oil.
The Melting and Mixing Process
Start by adding your shea butter, coconut oil, and beeswax to your glass container. Stir them gently as they melt into a golden, translucent liquid. Once everything is completely liquid, remove it from the heat. This is a crucial step. You must let the mixture cool for a minute or two before adding your essential oils. If the base is too hot, it can flash off the volatile compounds in the essential oils, reducing their therapeutic potency. Once it has cooled slightly but is still liquid, stir in your oils: ten drops each of eucalyptus, peppermint, and frankincense, five drops each of lemon, cinnamon, and clove, and three drops of lavender.
Storage and Shelf Life
Pour the liquid rub into small metal tins or glass jars. Small containers are great because you can keep one on your nightstand, one in your purse, and even give one to a friend. Let the jars sit undisturbed at room temperature until they have completely solidified. This usually takes about two hours. Because this recipe contains no water, it has a surprisingly long shelf life. As long as you keep it in a cool, dark place and use clean hands to apply it, your homemade vapor rub will stay fresh and potent for six months to a year.
How to Use Your Homemade Rub for Maximum Benefit
While the chest is the most common place to apply a vapor rub, it is certainly not the only spot. To get the most out of your natural creation, try these different application methods depending on your symptoms.
- The Chest and Neck: This is the classic application. Rub a generous amount over your sternum and up toward your throat. The heat from your body will slowly release the vapors, which you will then inhale naturally as you breathe.
- The Bottom of the Feet: This is an old folk remedy that many people swear by. The pores on the bottom of the feet are quite large, allowing for quick absorption into the bloodstream. Apply the rub to your soles and then put on a pair of thick cotton socks before bed.
- Between the Shoulder Blades: If you have a cough that feels like it is deep in your lungs, having someone rub this balm on your back, specifically between the shoulder blades, can be incredibly soothing.
- The Pulse Points: For a milder effect or to help with relaxation, dab a tiny bit on your wrists. This allows you to catch whiffs of the lavender and frankincense throughout the day.
Safety Considerations for Kids and Sensitive Skin
Natural does not mean “without caution.” Essential oils are highly concentrated plant extracts. If you are making this for young children, you should significantly reduce the number of drops of peppermint and eucalyptus, as these can sometimes be too intense for very small lungs. For toddlers, many aromatherapists recommend sticking to even gentler oils like lavender and cedarwood. Always perform a small patch test on the inside of the arm to ensure there is no skin sensitivity to the cinnamon or clove, which can be “hot” oils for some individuals.
The Environmental and Economic Benefits of DIY
Beyond the health benefits, making your own apothecary items is a win for the planet and your wallet. Most of the ingredients used in this recipe, like coconut oil and beeswax, can be bought in bulk. One large bag of beeswax pellets can last you through dozens of batches of salves, lip balms, and vapor rubs. Furthermore, by reusing glass jars or metal tins, you are significantly reducing the amount of single use plastic that ends up in landfills. It is a sustainable way to manage your household wellness.
Building Your Natural Medicine Cabinet
Once you see how easy it is to make this vapor rub, you might find yourself inspired to replace other conventional products. This rub is just the beginning. The same base of shea butter and beeswax can be used to create muscle salves, hand balms, or even solid perfumes. There is a profound sense of empowerment that comes from knowing exactly what is going onto your body and the bodies of your family members. You are no longer a passive consumer; you are an active participant in your own health journey.
Conclusion: Embracing a Simpler Way to Heal
In a world that often feels over-complicated and over-medicated, there is something revolutionary about melting down some butter and oils to create a healing balm. This homemade vapor rub is a testament to the fact that nature provides us with everything we need to feel our best. It is effective, it smells divine, and it carries with it the intention of care and wellness. The next time you feel a tickle in your throat or a heaviness in your chest, skip the pharmacy aisle and head to your kitchen. Your body will thank you for the gentle, plant-based support, and you will rest easier knowing you have harnessed the best of what the earth has to offer. So, gather your oils, melt your beeswax, and take that first deep, clear breath of natural relief.
Would you like me to generate some Pinterest Pin designs or a set of Instagram captions to help you promote this blog post?