DIY Walnut Ink Tutorial How to Make Permanent Natural Dye from Nut Husks
Nature has a remarkable way of hiding its most valuable treasures in plain sight. Often, the things we dismiss as yard waste or seasonal debris are actually the raw materials for ancient, time honored crafts. If you have ever walked under a black walnut tree in late autumn, you have likely seen the ground littered with heavy, green husks that slowly turn a bruised, messy black. To the average homeowner, these are a nuisance that stains the driveway and requires a heavy rake. But to the artist, the historian, and the sustainable crafter, these discarded shells represent a potent, permanent, and entirely chemical free source of pigment. This is the magic of walnut ink, a medium that has captured the thoughts of pioneers and master artists for centuries.
The Hidden Potential of the Walnut Husk
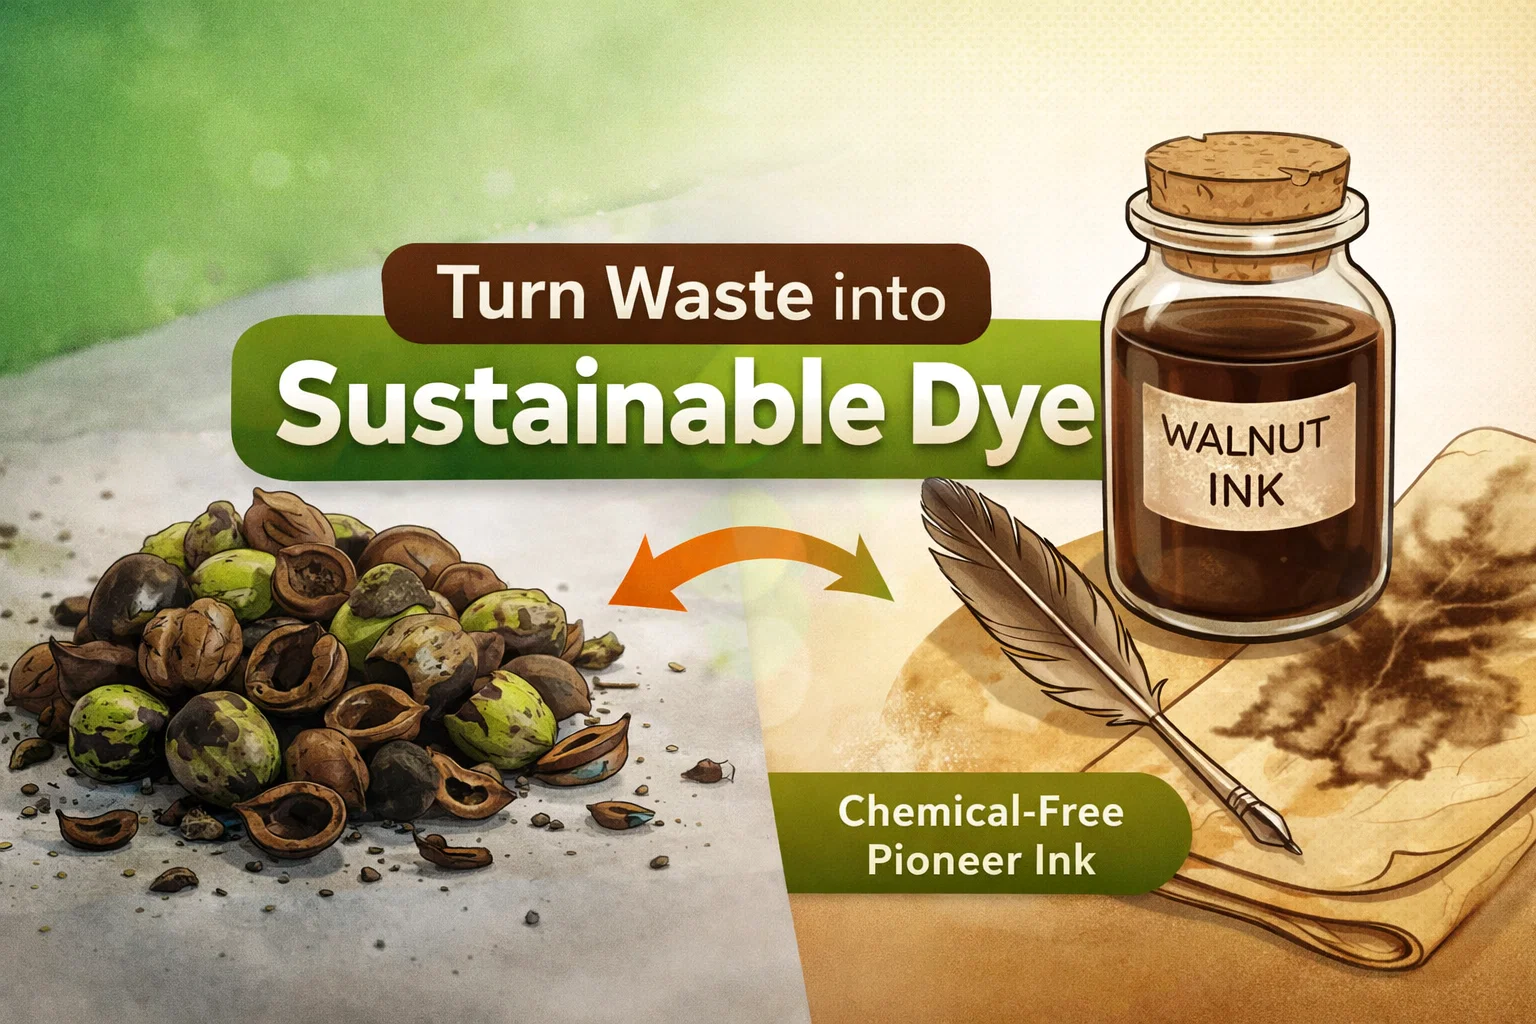
The image of a pile of rotting nut husks next to a bottle of rich, dark ink perfectly illustrates the concept of upcycling. The transformation from trash to permanent treasure is not just a catchy phrase; it is a chemical reality. The outer hull of the black walnut contains a high concentration of juglone and tannins. These natural compounds are what give the nut its protective qualities, but they also act as an incredibly effective dye. When these husks are processed, they release a deep, sepia toned liquid that binds beautifully to paper, wood, and natural fibers.
For those looking to reduce their reliance on synthetic, petroleum based art supplies, walnut ink is a revelation. Unlike many modern inks that rely on harsh solvents and artificial pigments, walnut ink is organic and biodegradable. It offers a connection to the earth that a plastic cartridge simply cannot match. When you write with ink you have brewed yourself from the trees in your neighborhood, every stroke of the pen feels more intentional and grounded.
A Brief History of Pioneer Ink
Long before art supply stores existed on every corner, people had to be resourceful. The use of walnut ink dates back centuries, favored by icons of art history like Leonardo da Vinci and Rembrandt. Its popularity stemmed from its lightfastness and its beautiful range of tones. In a pioneer setting, being able to produce a permanent ink from the landscape was a vital skill. Correspondence, legal documents, and journals were the primary way to maintain history, and the durability of walnut dye ensured those records would last for generations.
Why Modern Artists are Returning to the Past
We are currently witnessing a massive resurgence in natural dyeing and traditional pigment making. This shift is driven by a desire for sustainability and a fascination with the unique “imperfections” that natural materials provide. Every batch of homemade walnut ink is slightly different. Depending on the soil, the rainfall, and how long the husks fermented, you might get a warm, golden brown or a dark, near black espresso color. This variability is what makes the medium so soulful compared to the uniform, flat colors of mass produced office supplies.
The Science of Natural Tannins
To understand why walnut ink is so permanent, we have to look at the chemistry of tannins. Tannins are polyphenols found in various plants, acting as a defense mechanism against herbivores. When used as a dye, tannins act as a natural mordant, meaning they help the color “bite” into the material and stay there. This is why walnut ink does not require the addition of heavy metals or complex chemicals to remain lightfast. Once it dries on a porous surface like watercolor paper or raw parchment, it becomes remarkably resistant to fading over time.
How to Make Your Own Walnut Ink at Home
Creating your own ink is a sensory experience that brings you closer to the rhythm of the seasons. While the process is simple, it requires patience and a bit of a willingness to get your hands dirty. Pro tip: Always wear gloves! The same properties that make this a great ink will also stain your skin for weeks.
Step 1: Foraging and Preparation
The best time to collect walnuts is in the autumn when they fall naturally from the tree. You are looking for the ones where the green outer husk is starting to soften or turn black. You do not need the nut inside for the ink, so if you are also a fan of eating walnuts, you can harvest the meat for baking and keep the husks for your art studio. Place the husks in a large, stainless steel pot. Avoid using aluminum, as it can react with the tannins and alter the color.
Step 2: The Brewing Process
Cover the husks with water and bring the mixture to a simmer. You do not want a rolling boil, just a steady heat to help break down the organic matter. Some crafters choose to let the husks soak in cold water for several days before heating to deepen the extraction. As the water darkens, you will begin to see the rich, “pioneer dye” taking shape. This process can take several hours, and your kitchen will fill with a distinct, earthy aroma.
Step 3: Straining and Preserving
Once the liquid is dark enough for your liking, it is time to strain out the solids. Use a fine mesh sieve followed by several layers of cheesecloth or a coffee filter. It is crucial to remove all the tiny organic particles to prevent the ink from clogging your pens or growing mold. To ensure your ink lasts for years, many people add a small amount of clove oil or a piece of wintergreen as a natural preservative. Store the finished product in a glass jar with a tight seal, just like the “Walnut Ink” bottle seen in the illustration.
Creative Applications for Walnut Dye
Once you have a jar of this potent liquid, the creative possibilities are endless. It is a versatile medium that bridges the gap between drawing and painting.
- Calligraphy and Lettering: Use a dip pen or a glass stylus to create elegant, old world correspondence. The way the ink pools and shades creates a natural gradient that looks stunning on invitations.
- Watercolor Washing: Dilute the ink with water to create soft, atmospheric layers in your landscape paintings. It is perfect for creating a vintage or “antique” aesthetic.
- Fabric Staining: Walnut dye is an excellent choice for natural fibers like cotton, linen, and silk. It produces a range of tan to deep brown hues that are wash fast and eco friendly.
- Wood Finishing: Believe it or not, this ink makes a fantastic natural wood stain. It penetrates deep into the grain and provides a rich color without the harsh fumes of commercial stains.
The Environmental Impact of Choosing Natural
Every small choice we make as consumers and creators has an impact. By choosing to make ink from “trash,” we are participating in a circular economy. We are reducing the demand for plastic packaging and the chemical manufacturing processes involved in standard ink production. Furthermore, because walnut ink is non toxic, you can wash your brushes in the sink without worrying about introducing microplastics or harmful solvents into the water system. It is a win for the artist and a win for the planet.
Embracing the Slow Art Movement
In a world of instant gratification and digital perfection, there is something deeply satisfying about the “slow” process of making your own tools. The time spent raking the nuts, simmering the pot, and waiting for the ink to age allows you to develop a relationship with your medium. It encourages a mindful approach to creativity. When you finally sit down to draw or write, you aren’t just using a tool; you are using a piece of the earth that you have curated and transformed.
The Aesthetic of Antiquity
There is a reason why the “pioneer” look remains so popular. It evokes a sense of ruggedness, authenticity, and history. Walnut ink naturally creates this look because it is the very substance that created it in the first place. Whether you are scrapbooking, creating props for a film, or simply want your journal to look like it belongs in a different century, walnut ink is the gold standard for achieving that timeless sepia glow.
Conclusion: From the Ground to the Gallery
The next time you see a pile of fallen walnuts, do not look at them as a chore or a mess to be cleared away. Instead, see them as the beginning of your next masterpiece. The journey from a discarded nut husk on a driveway to a permanent, beautiful ink in a glass jar is a testament to human ingenuity and the bounty of the natural world. By embracing these traditional pioneer techniques, we can create art that is not only beautiful but also sustainable, historical, and deeply personal. So grab a rake, find a tree, and start brewing your own liquid history. Your pens, and the planet, will thank you.