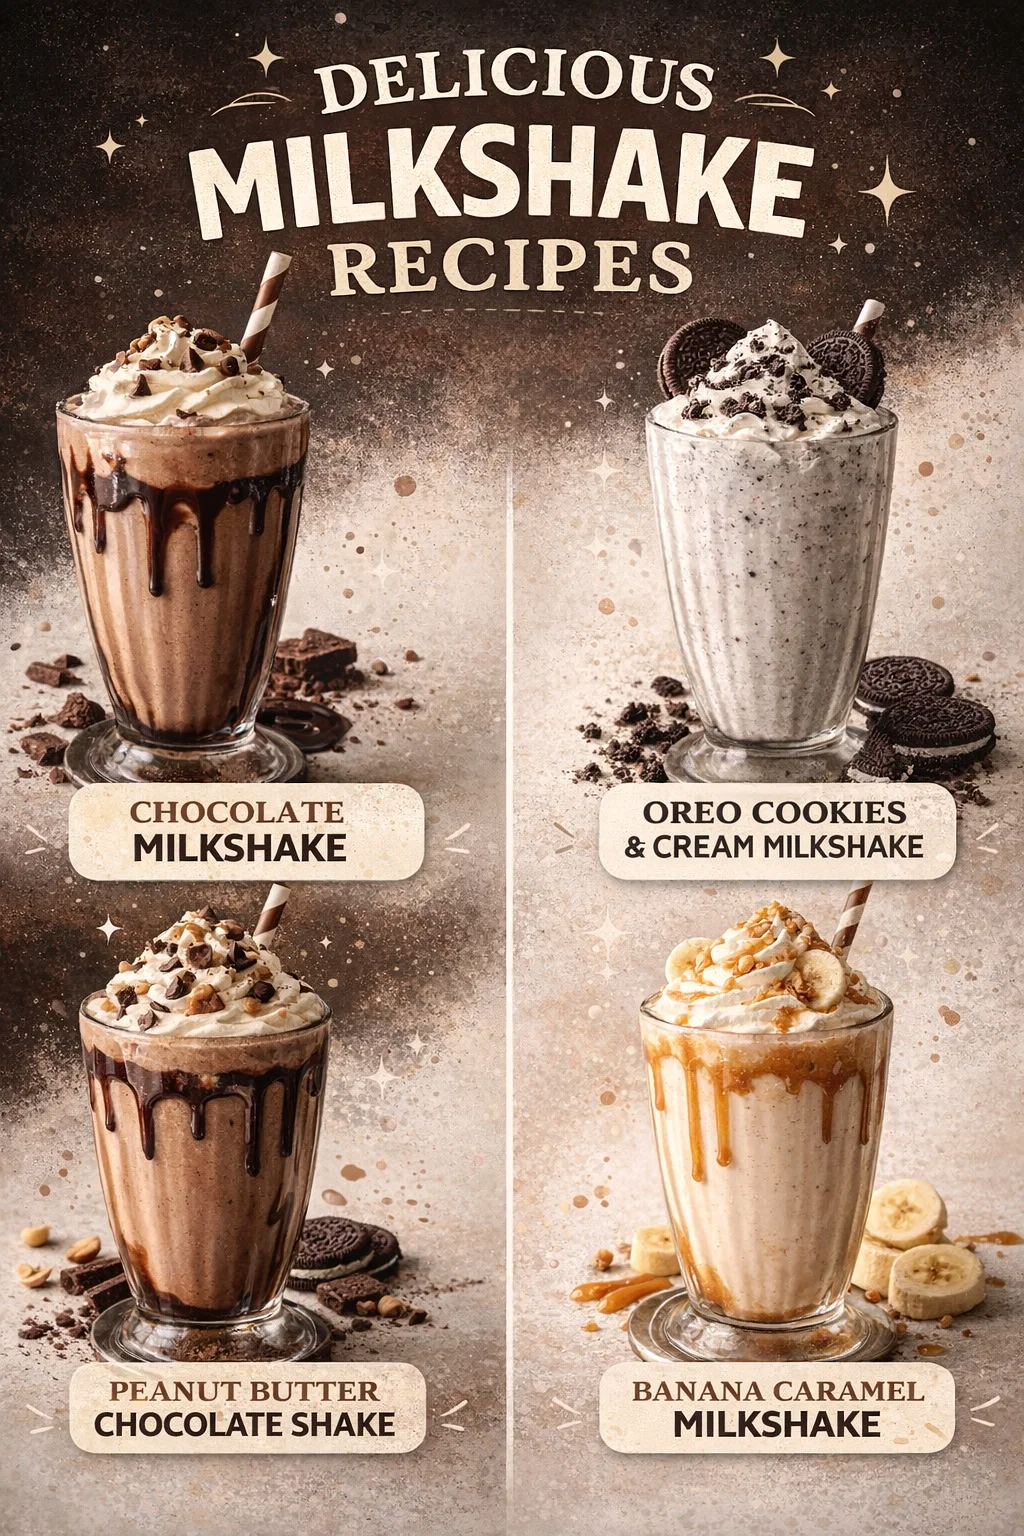
4 Quick and Easy Milkshake Recipes Chocolate, Oreo, Peanut Butter, and Banana Caramel
There is something universally comforting about a tall, frosted glass filled with a creamy milkshake. It is the ultimate indulgence, a nostalgic trip back to vintage diners, and a versatile canvas for some of the most decadent flavors imaginable. While grabbing a shake at a drive-thru is convenient, nothing compares to the thick, rich texture of a homemade milkshake crafted with premium ingredients. Whether you are hosting a summer backyard gathering, looking for a special weekend treat for the kids, or simply satisfying a late night sweet tooth, mastering the art of the milkshake is a skill every home cook should have in their repertoire.
The beauty of a milkshake lies in its simplicity. With just a few core components like high quality ice cream, cold milk, and flavorful mix-ins, you can create a dessert that rivals any specialty cafe. However, achieving that perfect consistency, not too thin that it feels like flavored milk, and not too thick that it breaks your straw, requires a bit of technique. In this guide, we are diving deep into four iconic recipes: the timeless Chocolate Milkshake, the crowd favorite Oreo Cookies and Cream, the indulgent Peanut Butter Chocolate, and the sophisticated Banana Caramel. Let us explore how to bring these gourmet treats to life in your own kitchen.
The Secrets to the Perfect Milkshake Consistency
Before we jump into the specific recipes, it is essential to understand the science behind a great shake. The foundation of any incredible milkshake is the ice cream. For the best results, always opt for full fat, premium ice cream. The higher the butterfat content, the creamier your shake will be. If you use ice milk or low fat versions, you will often end up with a watery or icy texture that lacks that signature velvety mouthfeel.
Temperature Matters
One common mistake is using ice cream straight from the deep freezer. If the ice cream is rock hard, you will be forced to add more milk to get the blender moving, which results in a thinner shake. Instead, let your ice cream sit on the counter for about five to ten minutes. You want it to be soft enough to scoop easily but still very cold. Similarly, make sure your milk is ice cold. Using room temperature milk will melt the ice cream instantly, ruining the thick texture we are aiming for.
The Golden Ratio
While everyone has their own preference, a standard professional ratio is generally two cups of packed ice cream to three quarters of a cup of milk. This creates a base that is thick enough to support toppings like whipped cream and cookie crumbles without being so dense that it is impossible to drink. If you prefer a spoonable shake, reduce the milk to half a cup. If you like it a bit more fluid, you can slightly increase the milk or add a splash of heavy cream for extra richness.
Classic Chocolate Milkshake: The Timeless Favorite
The chocolate milkshake is the gold standard of frozen desserts. It is simple, elegant, and deeply satisfying. While it might seem straightforward, the key to a truly standout chocolate shake is layering the chocolate flavors to create depth. Using chocolate ice cream is the start, but adding chocolate syrup and a hint of vanilla extract elevates the profile significantly.
To make this classic, combine two cups of chocolate ice cream with three quarters of a cup of whole milk. Add one tablespoon of high quality chocolate syrup and half a teaspoon of vanilla extract. The vanilla acts as a flavor enhancer, making the chocolate taste even richer. Blend on low speed until just combined. Over-blending can introduce too much air and cause the shake to melt faster. Pour it into a chilled glass and top with a generous swirl of whipped cream and a sprinkle of chocolate shavings for that professional touch.
Oreo Cookies and Cream: A Textural Masterpiece
There is a reason why cookies and cream is consistently one of the top selling ice cream flavors globally. The combination of smooth vanilla and crunchy, slightly bitter cocoa cookies is a match made in heaven. When turned into a milkshake, it becomes an addictive treat that appeals to both children and adults alike.
For this recipe, we use a vanilla ice cream base to let the Oreo flavor shine. In your blender, place two cups of vanilla ice cream and three quarters of a cup of cold milk. Add about six to eight Oreo cookies. A pro tip here is to crush the cookies slightly before putting them in the blender to ensure you get an even distribution of cookie bits throughout the shake. You can also add a tablespoon of chocolate syrup if you want a darker, more cocoa-forward flavor. Pulse the blender rather than running it continuously; you want small chunks of cookie to remain for texture. Garnish the rim with crushed Oreo pieces and a whole cookie wedged into the whipped cream.
Peanut Butter Chocolate: The Ultimate Indulgence
If you are a fan of the classic peanut butter cup, this milkshake is designed specifically for you. The saltiness of the peanut butter perfectly offsets the sweetness of the chocolate ice cream, creating a balanced and incredibly rich dessert. This is a heavy hitter in the world of shakes and is often filling enough to be a meal on its own.
Start with two cups of chocolate ice cream and three quarters of a cup of whole milk. Add two tablespoons of creamy peanut butter. It is important to use creamy rather than crunchy peanut butter to maintain the smooth integrity of the shake. Add a tablespoon of chocolate syrup and a quarter teaspoon of vanilla extract. Blend until the peanut butter is fully incorporated and the mixture is silky. For a visual “wow” factor, drizzle chocolate or peanut butter sauce down the inside of the glass before pouring in the shake. This creates beautiful swirls that look amazing on camera and add extra flavor to every sip.
Banana Caramel Milkshake: A Gourmet Twist
For those who prefer something a bit fruitier but still want that decadent caramel finish, the Banana Caramel milkshake is a fantastic choice. This flavor profile is reminiscent of a Bananas Foster dessert and offers a more sophisticated sweetness compared to the purely chocolate options.
This recipe uses one large ripe banana, sliced. The riper the banana, the sweeter and more intense the flavor will be. Combine the banana slices with two cups of vanilla ice cream, three quarters of a cup of cold milk, and two tablespoons of rich caramel sauce. A quarter teaspoon of vanilla extract helps tie the fruit and sugar notes together. Blend until the banana is completely smooth. When serving, top with whipped cream and an extra drizzle of caramel. If you want to go the extra mile, add a few fresh banana slices on top or even a sprinkle of sea salt to turn it into a salted caramel treat.
Tips for Serving and Presentation
We eat with our eyes first, and milkshakes are the perfect medium for creative presentation. If you want to impress guests or just make your own treat feel more special, consider these styling tips:
- Chill Your Glassware: Place your glasses in the freezer for at least 15 minutes before serving. This prevents the shake from melting the moment it touches the glass and keeps it cold until the last drop.
- The Drizzle Technique: Tilt your glass and slowly pour syrup (chocolate, caramel, or strawberry) around the inside rim, letting it streaks down the sides.
- Whipped Cream Peaks: Use a piping bag for your whipped cream to get those perfect, tall swirls seen in professional photos.
- Garnish Galore: Match your garnish to the flavor. For the Oreo shake, use cookie crumbs. For the banana shake, use a slice of fruit. For the chocolate shake, use cocoa powder or sprinkles.
Making it Healthier or Allergy Friendly
Milkshakes are indulgent, but they can be adapted for different dietary needs. For a dairy free version, swap the ice cream for a coconut milk or almond milk based frozen dessert and use oat milk or soy milk as the liquid. To reduce the sugar, look for low sugar ice cream brands and skip the optional sugar or syrups. You can also add a scoop of protein powder to the peanut butter shake to make it a post workout reward.
Equipment for the Best Results
While a high speed blender is the most common tool, you do not necessarily need a thousand dollar machine to make a great milkshake. A standard kitchen blender works perfectly fine as long as you do not overfill it. If you find yourself making shakes often, a dedicated milkshake mixer (the kind with the spindle) is a fun investment that aerates the mixture differently, resulting in a fluffier texture. Alternatively, if you are in a pinch, you can actually make a milkshake in a large mason jar by adding the ingredients and shaking it vigorously, though this will result in a much thinner consistency.
Conclusion: Your Signature Shake Awaits
Creating the perfect milkshake is a delightful blend of culinary science and personal creativity. By starting with high quality ingredients and following the proper ratios, you can transform a few simple items from your freezer and pantry into a world class dessert. Whether you stick to the classic chocolate or venture into the fruity world of banana caramel, the possibilities are endless. The next time you are looking for a way to brighten up a rainy afternoon or add a spark to a dinner party, skip the store bought tubs and whip up one of these four incredible recipes. Grab your blender, pick your favorite flavor, and start mixing. Your perfect, creamy, dreamy milkshake is just a few pulses away.