Soft and Fluffy Homemade Cheese Bread Recipe Easy Cheesy Bread Rolls
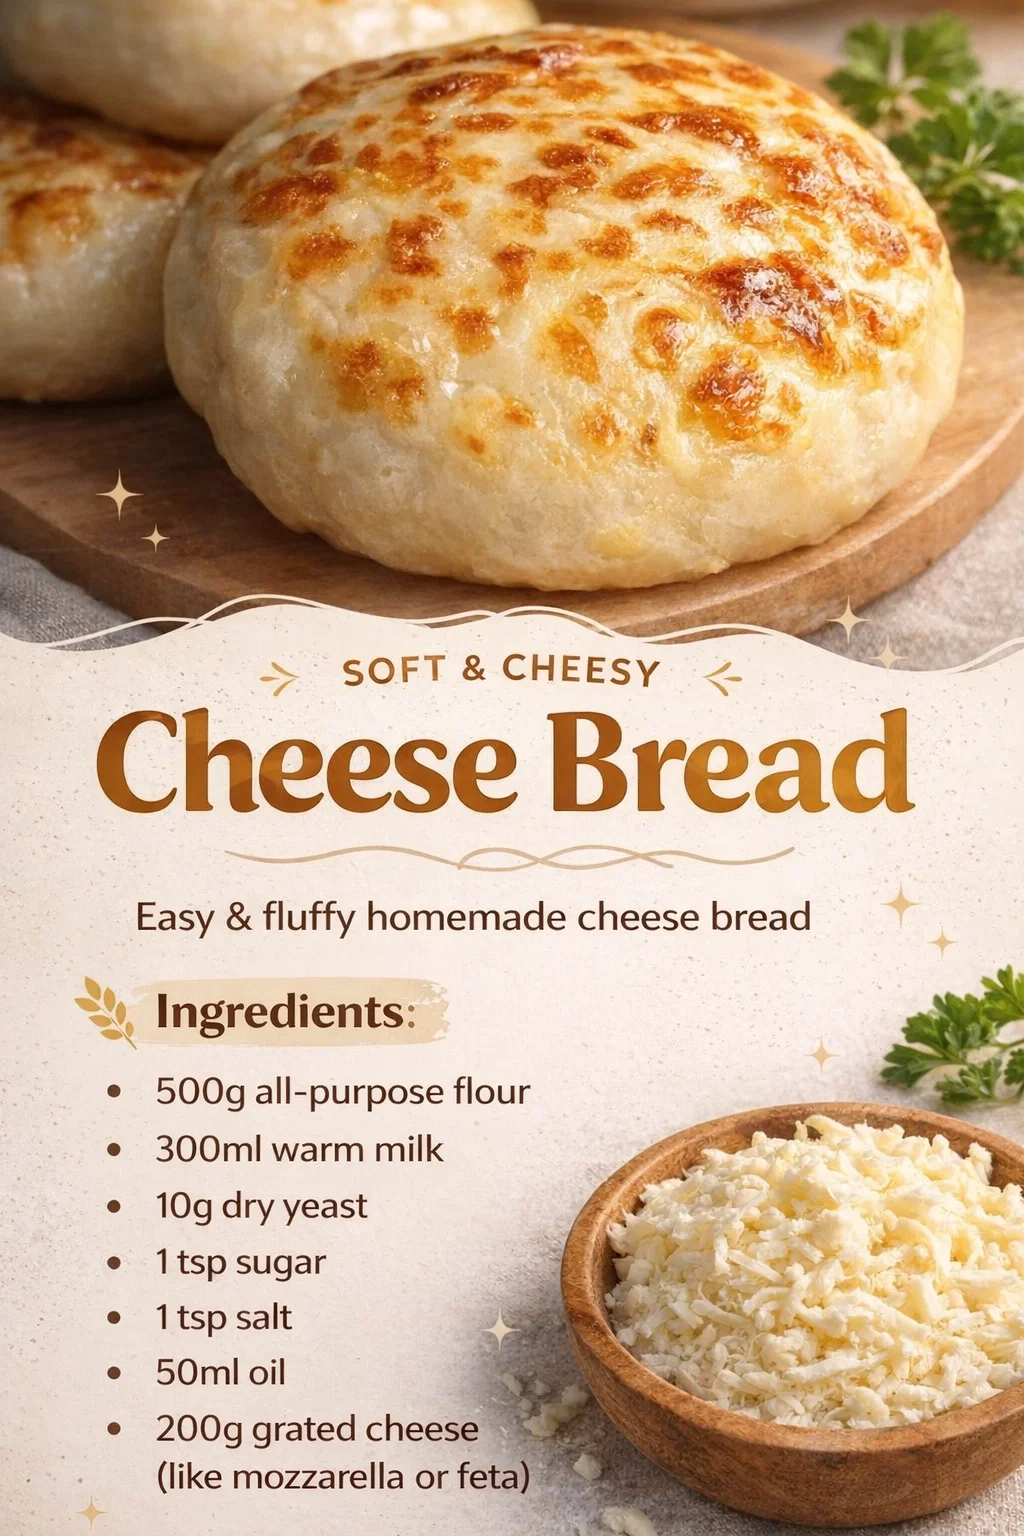
There is nothing quite like the aroma of freshly baked bread wafting through a kitchen. It is a scent that evokes comfort, warmth, and a sense of home. For many people, the thought of homemade bread brings up images of complex kneading processes, hours of waiting for dough to rise, and professional level equipment. However, the golden, cheese-topped rolls you see in the image prove that delicious, bakery quality bread is well within your reach, even if you are a beginner. This recipe for soft and fluffy cheese bread is designed to be accessible, rewarding, and, above all, incredibly tasty.
Bread making is as much a science as it is an art. Understanding how a few simple ingredients like flour, milk, yeast, and oil come together to create a cloud-like texture is the first step toward becoming a confident baker. When you add a generous amount of cheese into the mix, you transform a basic loaf into a gourmet treat that is perfect for snacking, serving with a hearty bowl of soup, or even enjoying as a standalone breakfast. Let us dive deep into the world of cheesy, homemade bread and explore why this specific recipe is a must try for your culinary repertoire.
The Magic of Simple Ingredients
One of the most beautiful aspects of this cheese bread recipe is its simplicity. You do not need exotic flours or expensive additives to achieve a professional result. The foundation of this bread lies in six core pantry staples that most of us already have in our kitchens. When these ingredients are combined with the right technique, they create a dough that is supple, easy to handle, and full of flavor.
All Purpose Flour as the Foundation
While many bread recipes call for high protein bread flour, this specific version uses 500 grams of all purpose flour. This choice is intentional. All purpose flour has a moderate protein content that allows the bread to remain soft and tender rather than becoming too chewy or tough. It provides just enough structure to hold the air bubbles created by the yeast, resulting in that coveted fluffy interior that pulls apart with ease.
The Role of Warm Milk and Yeast
The 300 ml of warm milk is the liquid gold of this recipe. Unlike water, milk adds fat, sugar, and protein to the dough, which contributes to a richer flavor and a much softer crumb. It also helps the crust brown beautifully in the oven. The milk must be warm to the touch but not hot, as extreme heat can kill the 10 grams of dry yeast. When yeast is happy and fed by the teaspoon of sugar, it produces carbon dioxide gas, which is what makes the dough rise and gives the bread its light, airy volume.
The Importance of Fat and Seasoning
To achieve a bread that stays soft for days, fat is an essential component. In this recipe, 50 ml of oil is used to coat the flour particles and interfere with gluten development just enough to keep the texture delicate. Whether you choose a neutral vegetable oil or a flavorful olive oil, this addition ensures the bread is moist and has a luxurious mouthfeel. Of course, a teaspoon of salt is vital for more than just flavor; it also helps control the fermentation rate of the yeast, ensuring the dough rises at a steady, manageable pace.
Selecting the Perfect Cheese
The star of the show is, of course, the 200 grams of cheese. The beauty of this recipe is its versatility. If you prefer a gooey, stretchy experience, mozzarella is the classic choice. It melts perfectly and creates those beautiful golden brown spots on the crust that are visible in the photo. On the other hand, if you want a tangy, salty kick, crumbled feta is a fantastic alternative. You can even mix and match cheeses, perhaps combining a sharp cheddar with a bit of parmesan for a more complex flavor profile.
A Step by Step Guide to Success
The process of making this bread is just as satisfying as eating it. While the image shows the finished product, the journey from flour to bun is a therapeutic one. It begins by blooming the yeast in the warm milk and sugar until it becomes frothy. This is your signal that the yeast is active and ready to work. Once you mix in the oil, flour, and salt, you will find yourself with a shaggy mass that slowly transforms into a smooth, elastic ball of dough as you knead it.
Kneading and the First Rise
Kneading is often the part that intimidates new bakers, but it is actually quite simple. You are essentially stretching the proteins in the flour to create a strong network. You will know the dough is ready when it feels bouncy and no longer sticks to your hands. Afterward, the dough needs a warm, draft free spot to rest. During this first rise, the dough should double in size, a process that usually takes about an hour depending on the temperature of your kitchen. This patience is what develops the flavor and the light texture.
Shaping and Adding the Cheese
Once the dough has risen, it is time to shape your rolls. You can divide the dough into equal portions and gently roll them into smooth rounds. This is where you can get creative with the cheese. You can either fold the cheese directly into the dough, stuff it into the center of each roll for a hidden surprise, or sprinkle it generously over the top as seen in the image. Brushing the tops with a little bit of egg wash or milk before baking will help the cheese adhere and give the bread a stunning, glossy finish.
Tips for Achieving the Golden Crust
The visual appeal of the bread in the image comes largely from that perfectly browned, bubbly cheese crust. To achieve this at home, oven temperature and placement are key. Baking at a moderately high temperature ensures that the bread cooks through while the cheese on top caramelizes into those delicious, crispy bits. If you find your cheese is browning too quickly, you can loosely cover the rolls with foil, but usually, the natural melting process creates exactly the look you are aiming for.
Using a Steam Environment
For an even better rise, some bakers like to place a small pan of water at the bottom of the oven during the first few minutes of baking. The steam keeps the surface of the dough moist, allowing it to expand fully before the crust sets. This leads to a larger, lighter bun that looks like it came straight from a professional bakery display case.
Why Homemade Bread is Better
Beyond the incredible taste, making your own cheese bread offers several benefits that store bought versions simply cannot match. When you bake at home, you have total control over the quality of the ingredients. There are no preservatives, artificial dough conditioners, or hidden sugars in this recipe. You are eating real food made with simple, wholesome components.
- Customization: You can add herbs like rosemary or thyme to the dough for an aromatic twist.
- Freshness: Nothing beats bread that is still warm from the oven.
- Cost Effective: Flour, yeast, and milk are very inexpensive, making this a budget friendly way to feed a family.
- Sense of Achievement: There is a unique pride that comes from serving food you created from scratch.
Pairing Suggestions for Your Cheese Bread
While these rolls are delicious enough to eat on their own, they are incredibly versatile when it comes to pairings. Their soft texture and savory cheese topping make them the perfect companion for a variety of meals. Imagine dipping a warm roll into a creamy tomato basil soup or using it to soak up the sauce from a rich beef stew. They also make excellent sliders if you slice them in half and fill them with grilled chicken or roasted vegetables.
The Perfect Breakfast Side
If you have any rolls left over the next morning, they are wonderful when toasted and served alongside scrambled eggs. The cheese gets crispy again, and the bread retains its softness. It is a quick and satisfying way to start the day with a bit of homemade luxury. You can even use them to make a savory breakfast sandwich with a bit of bacon and a fried egg.
Storing and Reheating for Longevity
If you do not finish the entire batch in one sitting, these rolls store remarkably well. To keep them soft, place them in an airtight container or a zip top bag once they have cooled completely. They will stay fresh at room temperature for about two days. If you want to keep them longer, they freeze beautifully. Simply wrap them individually and pop them in the freezer for up to a month.
Bringing Back the Freshness
To reheat, avoid the microwave if possible, as it can make bread rubbery. Instead, place the rolls in a 350 degree oven for about five minutes. This will revive the crust and melt the cheese, making the bread taste just as good as the day it was baked. It is a small step that makes a huge difference in the eating experience.
Conclusion
The image of those golden, cheesy rolls is more than just a mouthwatering photo; it is an invitation to explore the rewarding world of home baking. With just 500 grams of flour and a few simple steps, you can create something truly special that brings people together. This cheese bread recipe is a testament to the fact that you do not need complicated techniques to produce extraordinary results. Whether you are baking for a holiday dinner, a weekend snack, or just to practice a new skill, these fluffy rolls are sure to become a favorite in your household. So, clear off your counter, grab your mixing bowl, and get ready to enjoy the simple, timeless pleasure of homemade bread. Your kitchen is about to smell amazing, and your taste buds will certainly thank you.