How to Make Rosemary Water for Hair Growth Scalp Health DIY Hair Treatment Guide
Discovering a natural remedy that actually delivers on its promises can feel like finding a needle in a haystack. In a world saturated with expensive serums and chemical heavy treatments, the humble rosemary plant has emerged as a powerhouse for those seeking thicker, longer, and healthier hair. The image we are looking at today provides a simple yet effective blueprint for creating your own Rosemary Water at home. This ancient botanical secret is currently taking the beauty world by storm, and for good reason. It bridges the gap between traditional herbal wisdom and modern hair science, offering a DIY solution that is both accessible and incredibly potent.
Rosemary water is more than just a viral trend. It is a scalp stimulating tonic that works by improving circulation and delivering vital nutrients directly to the hair follicles. Whether you are struggling with thinning hair, looking to speed up your growth journey, or simply want to improve the overall texture of your tresses, this guide will walk you through everything you need to know about this botanical miracle. Let’s dive into the science, the methodology, and the best practices for integrating rosemary water into your lifestyle.
The Science Behind Rosemary and Hair Follicle Health
To understand why rosemary is so effective, we have to look at its chemical composition. Rosemary leaves contain carnosic acid, a compound known for its ability to heal tissue and nerve damage. When applied to the scalp, it helps rejuvenate the nerves and improve blood flow. This is crucial because hair follicles require a steady supply of oxygen and nutrients from the blood to stay in the growth phase for as long as possible.
Research has even suggested that rosemary oil can be as effective as minoxidil, a common over the counter hair growth treatment, but without the itchy scalp side effects often associated with pharmaceutical options. By using a water based infusion, you get a lightweight version of these benefits that won’t leave your hair feeling greasy or weighed down. This makes it a perfect daily or semi weekly treatment for all hair types, from fine and straight to thick and curly.
Step by Step Guide to Making Your Homemade Rosemary Water
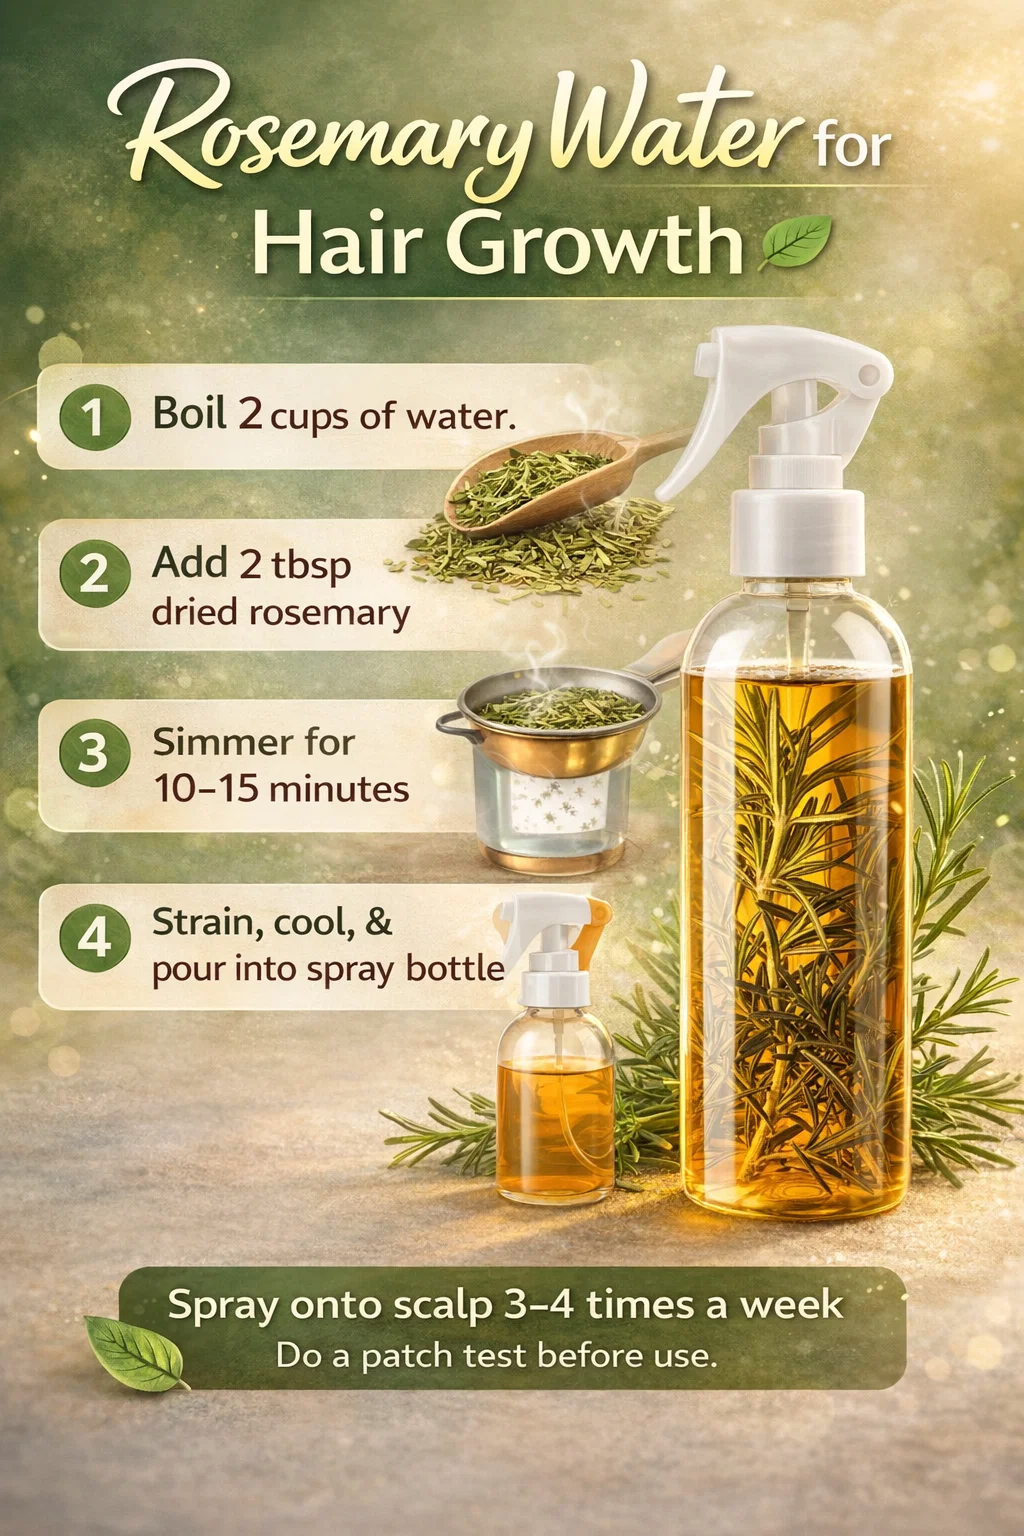
As outlined in our instructional visual, the process of making this hair tonic is straightforward and requires only a few household items. The beauty of this recipe lies in its simplicity. You do not need a chemistry degree to create a professional grade hair rinse in your own kitchen.
Step 1: Preparing the Base
Start by boiling 1 to 2 cups of filtered water in a small pot. Using filtered water is a great tip because it ensures that no chlorine or heavy minerals from tap water interfere with the herbal extraction. High quality water allows the rosemary to infuse more effectively, creating a cleaner final product for your scalp.
Step 2: Adding the Botanical Power
Once the water reaches a boil, add 1 to 2 tablespoons of dried rosemary leaves. You can also use fresh sprigs if you have a rosemary bush in your garden. If using fresh rosemary, you might want to double the amount to account for the water content in the fresh plant. The goal is to create a concentrated “tea” that is rich in essential oils and antioxidants.
Step 3: The Infusion Process
Lower the heat and let the mixture simmer for 10 to 15 minutes. During this time, you will notice the water changing color to a deep amber or brownish hue. This is a sign that the beneficial compounds are being released. Keep a lid on the pot during this stage to prevent the volatile oils from escaping with the steam. This keeps all the goodness right in the water.
Step 4: Cooling and Refining
After simmering, turn off the heat and let the water cool down completely. This cooling period is actually part of the steeping process. Once it reaches room temperature, use a fine mesh strainer or a funnel with a filter to remove the leaves. You should be left with a clear, fragrant liquid that is ready for application.
Step 5: Storage and Application
Pour your finished rosemary water into a clean spray bottle. Using a spray bottle is the most efficient way to ensure even distribution across your scalp. Store the bottle in the refrigerator to keep it fresh. Because this is a natural product without preservatives, it is best to make small batches that you can use within a week or two.
How to Use Rosemary Water for Maximum Results
Consistency is the secret ingredient to any hair growth journey. To see real change, you should aim to use your rosemary spray 3 to 4 times a week. The best method is to part your hair into sections and spray the liquid directly onto the scalp. Once applied, use your fingertips to gently massage the area for 3 to 5 minutes. This massage further boosts blood circulation and ensures the tonic reaches the follicles.
A common question is whether you should leave it in or wash it out. The instructions suggest rinsing it off after use, which is great if you have a very sensitive scalp or if you find the scent too strong. However, many people choose to use it as a leave-in treatment after their regular shower routine. If you choose to leave it in, make sure your hair is damp so the scalp absorbs the nutrients more readily.
The Importance of the Patch Test
While rosemary is a natural herb, it is still very potent. As the guide wisely suggests, always perform a patch test before your first full application. Apply a small amount of the rosemary water to the inside of your wrist or behind your ear and wait 24 hours. This ensures you don’t have an undiagnosed allergy or sensitivity to the plant. It is always better to be safe and ensure your skin loves the treatment as much as your hair will.
What Benefits Can You Expect to See?
When you start using rosemary water regularly, the changes usually happen in stages. In the first few weeks, many users report a significant decrease in scalp itchiness and dandruff. Rosemary has natural antimicrobial and antifungal properties, making it excellent for maintaining a clean and balanced scalp environment.
Around the two month mark, you might notice a reduction in hair shedding. Your hair may feel stronger at the roots and look shinier. Real growth, the kind where you see “baby hairs” filling in thin spots, usually takes about 3 to 6 months of consistent use. Patience is key when working with natural remedies, but the results are often more sustainable and healthier for your body in the long run.
Tips for Enhancing Your Rosemary Water
- Add Mint: Adding a few peppermint leaves to the boil can provide an extra cooling sensation and further stimulate blood flow.
- Essential Oils: If you want a stronger scent, add two drops of rosemary essential oil to the spray bottle once the water is cool.
- Apple Cider Vinegar: For those with oily scalps, adding a teaspoon of ACV to the final mix can help balance pH levels.
Common Mistakes to Avoid
One of the biggest mistakes is using the water while it is still hot. High heat can irritate the scalp and potentially damage fragile new hair growth. Always wait until the liquid is cool or cold. Another mistake is forgetting to store it in the fridge. Natural infusions can grow bacteria if left on a warm bathroom counter for too long. Treat your rosemary water like a fresh juice and keep it chilled.
Additionally, don’t overdo the concentration. More isn’t always better. Stick to the recommended 1 to 2 tablespoons per cup of water. Making the solution too strong could lead to scalp irritation for some individuals. Balance is the key to a successful DIY beauty routine.
Conclusion: Embracing a Greener Hair Care Routine
Transitioning to a natural hair care routine doesn’t have to be complicated or expensive. As we have seen through this simple five step process, a few minutes in the kitchen can result in a high performance hair growth tonic that rivals many luxury products. Rosemary water is a testament to the power of nature and the effectiveness of traditional herbalism.
By taking control of your ingredients, you are avoiding harsh chemicals and giving your hair the pure nourishment it deserves. Remember to be patient, stay consistent, and enjoy the refreshing, herbal ritual of caring for your scalp. Your journey to thicker, healthier hair starts with a single sprig of rosemary. Why not start your first batch today? Your future self with long, flowing locks will certainly thank you. Save this guide, keep it in your kitchen, and watch your hair transform one spray at a time.