DIY Underground Root Cellar for Long-Term Food Storage Preservation
Have you ever looked at a bountiful summer harvest or a massive pile of autumn root vegetables and wondered how on earth you were going to keep it all fresh without doubling your electricity bill? For centuries, our ancestors relied on a simple yet ingenious piece of technology that required no plugs, no refrigerant, and no maintenance. That technology is the underground root cellar. By harnessing the natural insulating properties of the earth, you can create a sanctuary for your produce that stays cool in the summer and remains frost free during the harshest winters. This traditional method of food preservation is seeing a massive resurgence as more people look toward sustainable living, homesteading, and food security.
In our modern world of instant refrigeration, we have largely forgotten the art of working with nature to store our food. However, as supply chains become less predictable and the desire for organic, homegrown food grows, the root cellar is making a triumphant comeback. It is not just a hole in the ground. It is a living, breathing ecosystem designed to balance humidity and temperature perfectly. Whether you are storing bins of potatoes, crates of crisp apples, or rows of colorful fermented jars, a well built root cellar is the ultimate tool for long term self sufficiency.
The Science of Earth Sheltered Storage
To understand why a root cellar works so effectively, we have to look at the physics of the soil beneath our feet. Once you go down about ten feet into the ground, the temperature of the earth stays remarkably consistent year round, regardless of whether there is a heatwave or a blizzard happening on the surface. This thermal mass acts as a giant battery of coolness. By building into the earth, you are utilizing this natural stability to protect your food from the volatile swings of the atmosphere.
But temperature is only half of the equation. Humidity plays an equally vital role in food preservation. Most root vegetables like carrots, beets, and potatoes are comprised mostly of water. In a standard modern refrigerator, the air is very dry, which causes vegetables to shrivel and lose their crunch within weeks. A root cellar, especially one with a dirt or stone floor, maintains high humidity levels, often between 80 percent and 95 percent. This prevents the vegetables from transpiring and drying out, keeping them as plump and nutritious in March as they were when you pulled them from the soil in October.
Key Components of a Successful Root Cellar
If you look at the design of a professional grade underground cellar, you will notice a few recurring features that are non negotiable for success. First and foremost is the ventilation system. You might think that a sealed room is best, but food is actually alive and breathing. As fruits and vegetables sit in storage, they release ethylene gas and heat. Without proper airflow, this gas will build up and cause your produce to ripen and rot prematurely.
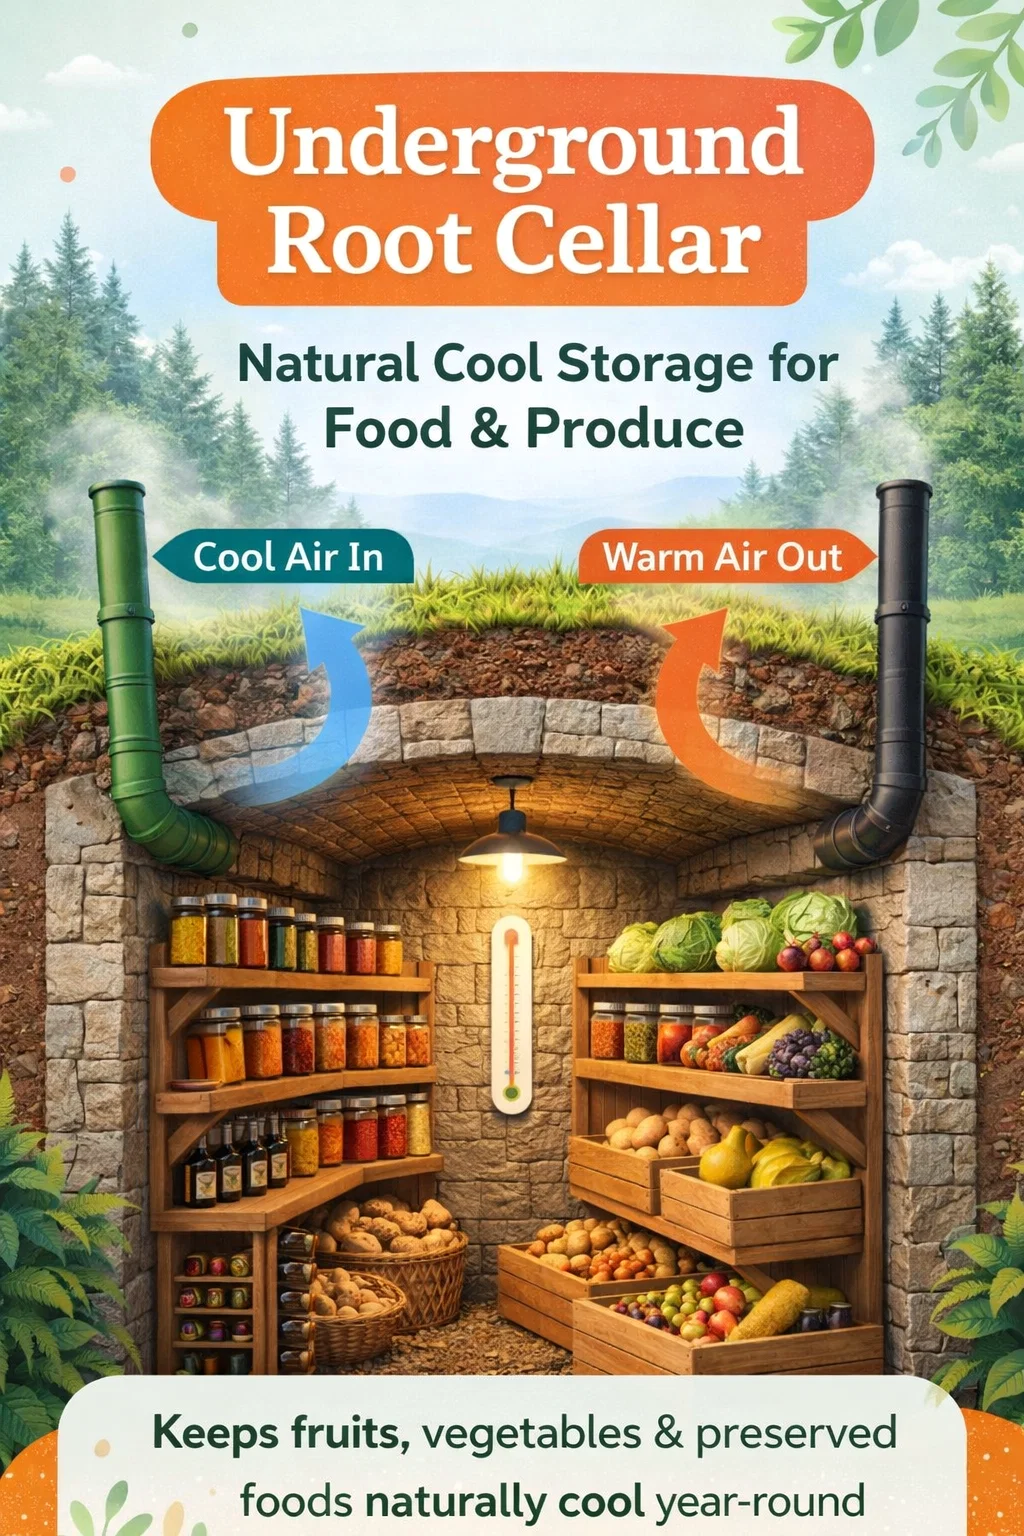
The Intake and Exhaust System
A dual pipe ventilation system is the golden standard for DIY builders. You generally want a low intake pipe that brings in cool, fresh air from the outside and a high exhaust pipe that allows warm, stale air and ethylene gases to escape. This creates a natural siphon effect. The cool air enters, sinks to the floor, and as it warms up slightly from the thermal mass of the produce, it rises and exits through the ceiling vent. This constant, gentle air exchange is the secret to preventing mold and keeping the air sweet and fresh.
Effective Insulation and Drainage
While the earth does most of the work, the ceiling of your cellar is the most vulnerable point. Because it is closest to the surface, it needs a thick layer of soil or high quality insulation to prevent the summer sun or winter frost from penetrating the roof. Additionally, you must consider drainage. Nobody wants a flooded cellar. Building on high ground or installing a gravel floor with a French drain system ensures that while the air stays humid, the floor stays free of standing water.
Step by Step Guide to Building Your DIY Cellar
Building a root cellar does not require a degree in engineering, but it does require some sweat equity and careful planning. The most common DIY approach involves using concrete blocks, stone, or even repurposed materials like large culvert pipes or buried chest freezers. For a permanent, walk in structure, stone and mortar or cinder blocks are the most durable choices.
Site Selection and Excavation
Start by choosing a spot with good drainage. A north facing slope is ideal because it receives less direct sunlight, helping to keep the entrance cool. Once you have your spot, you will need to excavate. Most builders recommend going at least six to eight feet deep to reach the most stable temperatures. If you hit the water table, you may need to adjust your depth or choose a different location. Safety is paramount here. Always ensure your walls are shored up during the build to prevent cave ins.
Laying the Foundation and Walls
Many traditionalists swear by a dirt floor because it helps regulate humidity, but a layer of gravel is often more practical for keeping things clean. Build your walls using heavy materials like stone or concrete blocks. These materials have high thermal mass, meaning they soak up the coolness of the earth and radiate it back into the room. As you build, remember to leave openings for your ventilation pipes and your door frame.
The Importance of an Air Tight Door
Your door is the weakest link in your insulation. It should be heavy, well insulated, and weather stripped. Many homesteaders use a double door system, often called an airlock or a vestibule. This consists of an outer door and an inner door with a small space in between. This prevents a massive gust of warm summer air from rushing into your cold storage every time you go in to grab a jar of pickles.
Organizing Your Cellar for Maximum Shelf Life
Once your structure is complete, how you arrange your food is just as important as how you built the walls. Not all produce plays well together. For instance, apples and pears release high amounts of ethylene gas, which can cause potatoes to sprout or carrots to taste bitter. It is a good idea to keep your fruits on the higher shelves near the exhaust vent and your root vegetables lower down where it is coolest and more humid.
Shelving and Container Choices
Use rot resistant wood like cedar or locust for your shelving. Avoid treated lumber, as the chemicals can off gas into your food. Slatted shelves are better than solid ones because they allow air to circulate around the bottom of your crates. For crops like carrots and beets, many people find success burying them in buckets of damp sand or sawdust, which mimics the moist soil they grew in and keeps them fresh for many months.
Monitoring Temperature and Humidity
You cannot manage what you do not measure. Installing a high quality hygrometer and thermometer is essential. You want to aim for a temperature between 32 and 40 degrees Fahrenheit. If it gets too cold, you might need to plug one of the vents. If it gets too warm, you can open the vents at night to let in the chilly evening air. It is a rhythmic process of checking in on your harvest and making small adjustments based on the season.
The Benefits of Food Preservation and Self Sufficiency
There is a profound sense of peace that comes from walking into a well stocked root cellar in the middle of January. When the grocery store shelves are thin or the prices of fresh produce skyrocket, you have a literal gold mine of nutrition right in your backyard. This is the heart of food security. You are no longer dependent on a complex global logistics chain for your daily nutrients.
Beyond the practical side, there is the flavor. A potato that has been stored in cool, moist earth retains its texture and sweetness far better than one that has been sitting in a plastic bag in a warehouse. Root cellaring allows you to eat seasonally and locally, even in the dead of winter. It encourages a deeper connection to the land and a greater appreciation for the cycle of the seasons.
Common Mistakes to Avoid
Even with the best intentions, DIY builders often run into a few hurdles. One of the most common mistakes is poor ventilation. If you see condensation dripping from the ceiling or notice a musty, moldy smell, your airflow is insufficient. You may need to increase the diameter of your pipes or add a small solar powered fan to assist the movement of air.
Another mistake is storing damaged produce. One bad apple really does spoil the whole bunch. Before you bring anything into your cellar, inspect it thoroughly. Any vegetable with a bruise, a cut, or signs of insect damage should be eaten immediately or processed for canning. Only the most perfect, unblemished specimens should be destined for long term storage. This practice of curing and sorting is what separates a successful cellar from a pile of compost.
Conclusion: Building a Legacy of Sustainability
Building a DIY underground root cellar is more than just a home improvement project. It is a commitment to a more resilient and sustainable way of life. It is an investment in your family’s health and a nod to the wisdom of the past. By combining ancient techniques with modern materials, you can create a food storage system that will serve you for decades to come.
As you begin your journey into the world of earth sheltered storage, remember that every cellar is unique. Your soil type, your climate, and your specific harvest will all dictate how your cellar performs. Start small, observe how your food reacts, and do not be afraid to make tweaks along the way. With a little bit of planning and some hard work, you will soon have a beautiful, cool sanctuary filled with the fruits of your labor, ready to sustain you through every season of the year. Happy building and happy harvesting!