
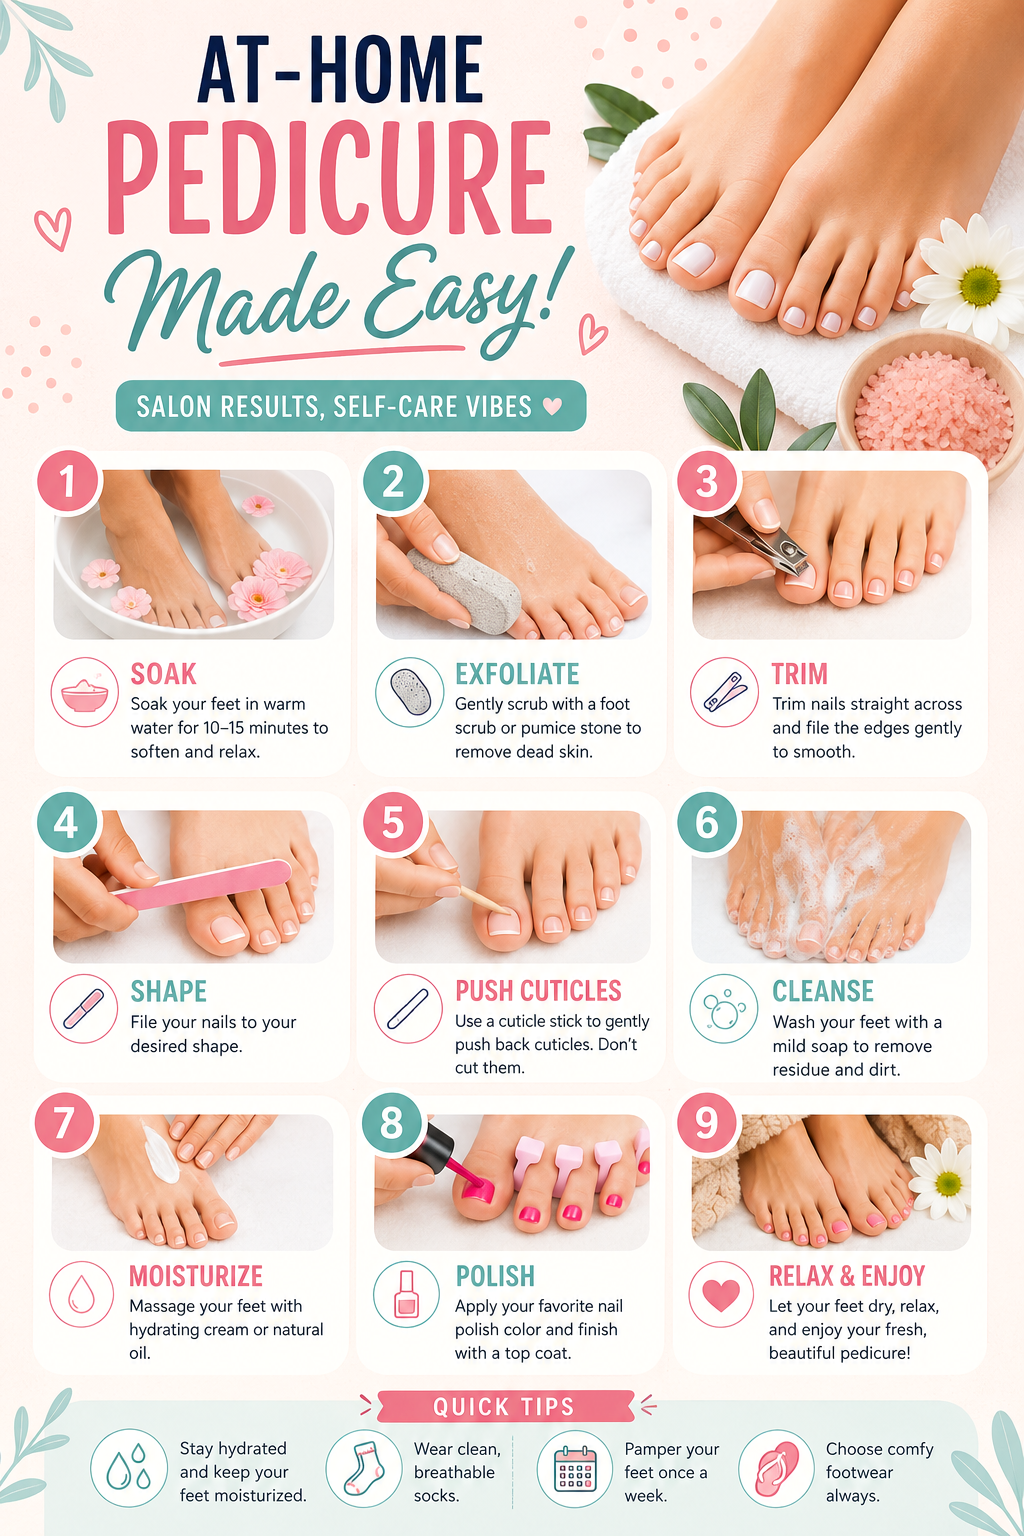
DIY Pedicure at Home Step-by-Step Guide for Soft, Smooth Beautiful Feet
Soft, healthy feet can make a surprising difference in your daily comfort and confidence. Whether you spend long hours standing, enjoy wearing open-toe shoes, or simply love a relaxing self-care routine, giving your feet regular attention is well worth the effort. A DIY pedicure at home is an affordable and convenient way to maintain beautiful feet without scheduling a salon appointment. With just a few basic tools and a little time, you can transform tired, dry feet into soft, refreshed, and polished ones while enjoying a calming spa-like experience in the comfort of your own home.
Key Takeaways
- Follow a consistent step-by-step routine for the best results.
- Exfoliation helps remove rough, dry skin and improves softness.
- Proper nail trimming can help reduce the risk of ingrown toenails.
- Daily moisturizing keeps feet hydrated and healthy.
- Regular home pedicures save time and money while supporting foot health.
Why a Home Pedicure Is Worth the Time
A home pedicure is more than just a beauty routine. It combines relaxation, hygiene, and self-care into one enjoyable experience. Your feet support your body every day, yet they are often overlooked until dryness, rough heels, or discomfort become noticeable.
Regular foot care helps maintain smoother skin, healthier nails, and better overall comfort. It can also improve the appearance of your feet, making them look neat and well-groomed throughout the year.
Important: Healthy feet begin with consistent care rather than occasional treatments. Even a simple weekly routine can make a noticeable difference in skin texture, nail appearance, and overall foot comfort.
Preparing for the Perfect DIY Pedicure
Gathering everything before you begin makes the process smooth and enjoyable. Most home pedicure essentials are affordable and easy to find.
Basic Supplies You’ll Need
- Large bowl or foot spa
- Warm water
- Epsom salt or bath soak
- Pumice stone or foot scrub
- Nail clippers
- Nail file
- Cuticle stick
- Mild soap
- Soft towel
- Foot cream or moisturizing lotion
- Base coat, nail polish, and top coat if desired
Creating a relaxing environment can also enhance the experience. Soft lighting, calming music, and a comfortable chair help turn a simple beauty routine into a mini spa session.
Step 1: Soak Your Feet
Begin by soaking your feet in warm water for about 10 to 15 minutes. Adding Epsom salt or a few drops of your favorite essential oil can create a soothing experience while helping soften dry skin.
The warm water loosens dirt, softens calluses, and prepares your feet for exfoliation. This step also provides a relaxing break after a busy day.
Step 2: Exfoliate Dead Skin
Once your skin has softened, gently exfoliate your feet using a pumice stone or foot scrub. Focus on rough areas such as the heels, balls of the feet, and outer edges.
Use gentle pressure instead of aggressive scrubbing. Removing small amounts of dead skin regularly is more effective than trying to eliminate thick calluses in one session.
Expert Insight
Gentle exfoliation performed consistently is healthier than excessive scrubbing. Over-exfoliating may leave skin sensitive and prone to irritation, while regular maintenance keeps feet naturally smooth.
Step 3: Trim Your Toenails Properly
Trim toenails straight across using clean nail clippers. This helps encourage healthy nail growth and may reduce the chance of ingrown nails.
Avoid cutting nails too short. Leaving a slight edge protects the nail bed while maintaining a neat appearance.
Common Nail Trimming Mistakes
- Cutting nails too short
- Rounding the corners excessively
- Using dull nail clippers
- Ignoring damaged or cracked nails
Step 4: Shape the Nails
After trimming, use a nail file to smooth the edges. File gently in one direction rather than using a back-and-forth motion. This helps reduce splitting and creates a clean, polished shape.
Select a nail shape that feels comfortable and matches your personal style while maintaining practicality.
Step 5: Care for Your Cuticles
Softened cuticles can be gently pushed back using a wooden or silicone cuticle stick. This creates a cleaner nail appearance and prepares the nails for polish if you choose to apply it.
Avoid cutting healthy cuticles since they help protect the nail from bacteria and irritation.
Pro Tip: Applying a small amount of cuticle oil before pushing cuticles back makes the process gentler while helping keep the surrounding skin hydrated.
Step 6: Cleanse Your Feet
Wash your feet with mild soap to remove loosened skin, scrub residue, and remaining debris. Rinse thoroughly and dry carefully, paying special attention to the spaces between your toes.
Clean feet create the ideal foundation for moisturizer and nail polish.
Step 7: Moisturize Deeply
Hydration is one of the most important parts of any foot care routine. Apply a generous amount of foot cream or natural oils such as coconut or almond oil, then massage your feet using slow circular motions.
Massage helps distribute moisturizer evenly while creating a relaxing finish to your self-care session.
Important: Moisturizing immediately after cleansing helps lock in hydration while keeping heels softer for longer. Consistent moisturizing is often the secret behind healthy-looking feet.
Step 8: Paint Your Nails
If you’d like a polished finish, begin with a base coat to help create a smooth surface. Follow with your chosen nail polish color, allowing each coat to dry before applying another.
Finish with a quality top coat to add shine and help protect your manicure from chips.
Tips for Better Nail Polish Results
- Apply thin coats instead of thick layers.
- Allow each coat to dry before adding another.
- Seal the nail tips with the top coat.
- Avoid wearing shoes immediately after painting.
Step 9: Relax and Enjoy the Results
Allow your nails to dry completely before walking or putting on socks. Once dry, enjoy the feeling of refreshed, soft feet and neatly groomed nails.
A home pedicure can become a relaxing weekly ritual that promotes both wellness and confidence.
Extra Tips for Healthier Feet
- Moisturize daily, especially before bedtime.
- Wear breathable socks made from comfortable fabrics.
- Choose supportive footwear that fits properly.
- Drink enough water to support healthy skin.
- Inspect your feet regularly for dryness or irritation.
- Replace worn pumice stones and nail tools when necessary.
Building a Weekly Foot Care Routine
Consistency is more valuable than spending hours on occasional treatments. Setting aside just 20 to 30 minutes each week helps maintain healthy skin, attractive nails, and overall foot comfort.
A simple routine might include soaking, exfoliating, trimming if needed, moisturizing, and polishing every weekend. Daily moisturizing between sessions keeps results lasting longer.
Common Home Pedicure Mistakes to Avoid
- Using water that is too hot.
- Over-scrubbing rough skin.
- Cutting cuticles.
- Skipping moisturizer.
- Applying polish before nails are completely dry.
- Using dirty or shared nail tools.
Quick Points
- Soak before exfoliating for softer skin.
- Trim nails straight across for cleaner results.
- Hydrate feet every day.
- Repeat your pedicure weekly for ongoing maintenance.
- Finish with a top coat for longer-lasting polish.
Conclusion
A step-by-step pedicure at home is a practical way to enjoy healthier feet while creating time for relaxation and self-care. With simple tools and a consistent routine, you can maintain smooth skin, neatly shaped nails, and polished results throughout the year. From soaking and exfoliating to moisturizing and finishing with your favorite nail color, every step contributes to healthier, happier feet. Make this routine part of your weekly schedule, and you’ll enjoy lasting comfort along with beautiful salon-inspired results without leaving home.
Tags
DIY Pedicure Home Pedicure Foot Care Self Care Soft Feet Nail Care Beauty Routine Home Spa