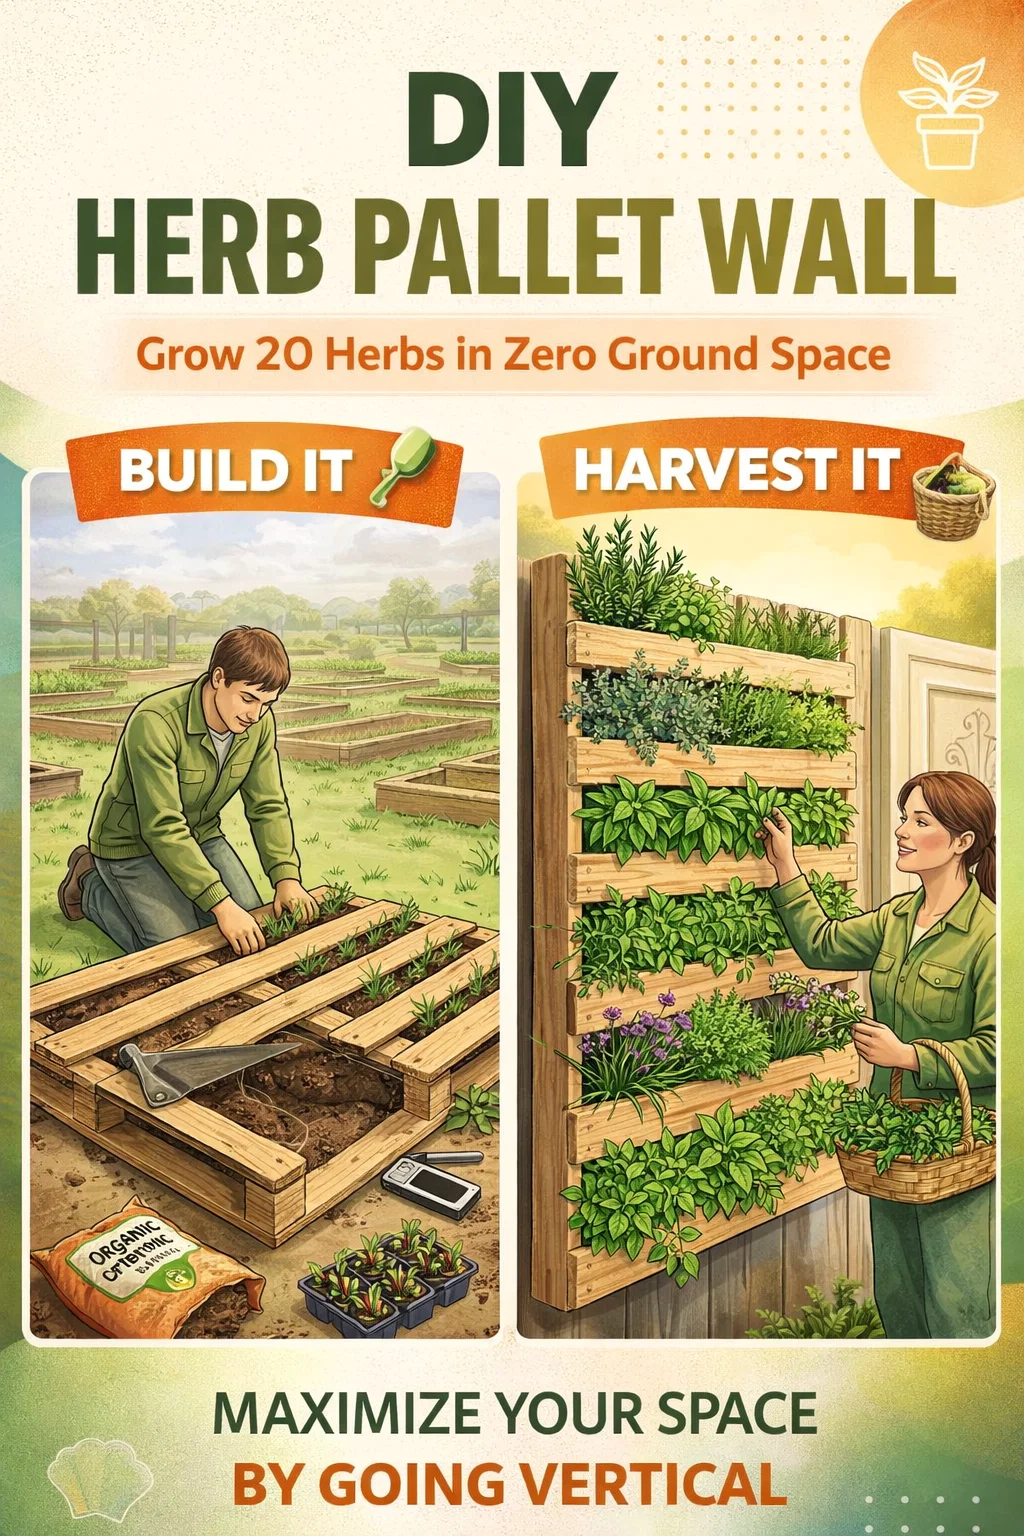
How to Build a DIY Vertical Herb Garden Pallet Wall for Small Spaces
Transforming a vacant wall or a plain wooden fence into a lush, edible sanctuary is one of the most rewarding DIY projects any homeowner can undertake. The beauty of a vertical herb pallet wall lies in its simplicity and efficiency. For those who love the idea of farm-to-table cooking but find themselves limited by a small backyard or a lack of traditional garden beds, this solution offers a way to cultivate up to twenty different herbs in a single, compact footprint. It is a brilliant marriage of rustic aesthetics and practical urban farming that brings life to underutilized outdoor spaces.
Why Vertical Gardening is the Future of Small Spaces
As living spaces become more compact, the way we think about gardening has to evolve. Traditional gardening relies on horizontal square footage, which is a luxury many people simply do not have. Vertical gardening flips this concept on its head by utilizing the height of fences, walls, and balconies. By building upwards, you can grow a significant amount of food without sacrificing a single inch of lawn or patio floor.
Beyond the spatial benefits, vertical gardening offers a healthier environment for your plants. Herbs grown off the ground are less susceptible to soil-borne diseases and pests like slugs or rabbits. Better air circulation around the foliage also prevents fungal issues, ensuring that your basil, mint, and rosemary stay vibrant and productive throughout the growing season. Plus, the sheer convenience of having your ingredients at eye level makes the harvesting process a joy rather than a chore.
The Essential Materials for Your Herb Pallet Wall
Before you begin the assembly process, gathering the right materials is crucial for a long-lasting and safe garden. Since you will be growing edible plants, the type of pallet you choose is the most important factor. Always look for pallets marked with a HT stamp, which stands for Heat Treated. Avoid pallets marked with MB, as these have been treated with Methyl Bromide, a toxic pesticide that you do not want leaching into your culinary herbs.
- One Heat-Treated Wooden Pallet: Ensure it is in good structural condition with no major cracks.
- Landscape Fabric: This heavy-duty weed barrier will hold the soil in place while allowing water to drain.
- Heavy-Duty Staple Gun: Essential for securing the fabric to the wooden slats.
- Organic Potting Mix: Choose a high-quality mix designed specifically for containers to ensure proper drainage and nutrient delivery.
- Assorted Herb Starters: Think about your cooking habits. Popular choices include basil, thyme, oregano, chives, rosemary, and mint.
- Sanding Block: To smooth out any rough edges and prevent splinters during the build and harvest.
Step-by-Step Guide: Building Your Vertical Garden
The construction of a pallet wall is remarkably straightforward. It does not require advanced carpentry skills, making it an ideal weekend project for beginners. The goal is to create pockets of soil within the internal structure of the pallet that can support the root systems of your plants.
Preparing the Pallet
Start by laying your pallet flat on the ground. Use your sanding block to smooth over the front slats and the sides. This not only makes the unit safer to handle but also prepares the wood if you decide to stain or paint it later. Once sanded, flip the pallet over so the back is facing up. This is where you will apply the landscape fabric to create the “backing” of your planter boxes.
Lining and Stapling
Cut your landscape fabric into large sheets. You want to double or triple layer the fabric on the back and bottom of the pallet to ensure it can support the weight of wet soil. Staple the fabric securely along every single slat and the outer frame. The tighter the fabric, the less likely it is to sag over time. Once the back and bottom are sealed, you can also create individual pockets inside the slats for extra security, though many gardeners prefer to fill the entire internal cavity for maximum root space.
Filling and Planting Flat
This is the secret to a successful pallet garden: Plant it while it is flat. With the fabric secured, flip the pallet back over so the front slats are facing up. Pour your organic potting mix into the openings, shaking the pallet slightly to help the soil settle into the bottom. Once the pallet is full of soil, tuck your herb starters into the gaps between the slats. Pack them in tightly, as this helps hold the soil in place when you eventually stand the pallet up.
The Best Herbs for Your Vertical Wall
Not all herbs are created equal when it comes to vertical growth. You want to select varieties that have different growth habits to create a visually stunning and diverse wall. Ideally, you should place trailing herbs at the bottom and more upright, sun-loving herbs at the top.
Top Tier: The Sun Seekers
The top of your pallet wall will receive the most direct sunlight and will likely dry out faster than the bottom. This is the perfect spot for Mediterranean herbs like Rosemary and Sage. These plants love the heat and can handle slightly drier conditions. They also provide a sturdy, upright structure that anchors the top of your display.
Middle Tier: The Kitchen Staples
In the middle sections, where the soil stays a bit more consistently moist, plant your Basil, Oregano, and Thyme. Basil is particularly happy in the middle of the wall because it is protected from the harshest winds while still getting plenty of light. Thyme and oregano will eventually start to spill over the edges of the wooden slats, creating a beautiful softening effect on the timber.
Bottom Tier: The Moisture Lovers
The bottom slats of the pallet stay the dampest because water naturally trickles down through the levels. This is the ideal home for Mint and Parsley. Mint is notoriously invasive in a traditional garden, but in a pallet wall, its growth is contained by the wooden slats. It will happily trail toward the ground, providing a lush green base for your vertical garden.
Maintenance and Care for Long-Term Success
Once your pallet wall is leaning against its final home or securely mounted to a fence, the maintenance phase begins. Because the volume of soil is smaller than in a traditional garden bed, vertical planters require a bit more attention to watering. During the height of summer, you may need to water your herb wall every morning to keep the plants from wilting.
Feeding your herbs is also essential. Since you are watering frequently, nutrients tend to wash out of the potting mix over time. Use a liquid organic fertilizer every two weeks to keep the foliage lush and flavorful. Also, do not be afraid to harvest often! Pinching back the tips of herbs like basil and mint actually encourages the plant to grow bushier and produce more leaves, preventing them from becoming “leggy.”
Designing for Aesthetics: Beyond the Wood
While a raw wooden pallet has a charming rustic look, you can easily customize the appearance to match your home decor. If you have a modern minimalist patio, consider painting the pallet a sleek charcoal grey or white. This makes the green of the herbs pop and gives the project a more high-end feel. For a boho or farmhouse vibe, a light wood stain or even a distressed “shabby chic” paint job works beautifully.
You can also add functional aesthetic touches, such as small chalkboard labels on each slat to identify the herbs. This is particularly helpful if you have multiple varieties of similar-looking plants, like Thai Basil versus Sweet Basil. Not only does it look professional, but it also helps guests identify the fresh ingredients you are using in your outdoor cooking.
The Environmental Impact of Upcycling Pallets
Choosing to build an herb wall out of a pallet is an act of environmental stewardship. Millions of pallets end up in landfills every year. By reclaiming one and turning it into a productive garden, you are participating in the circular economy. Furthermore, growing your own herbs reduces your reliance on store-bought produce, which is often packaged in single-use plastics and transported over long distances. Your vertical wall is a small but meaningful step toward a more sustainable and self-sufficient lifestyle.
Conclusion: Bringing the Garden to You
Creating a vertical herb pallet wall is more than just a weekend DIY task; it is about reclaiming the joy of gardening regardless of your living situation. It proves that you do not need an acre of land to enjoy the scent of fresh rosemary or the taste of sun-warmed basil. This project is accessible, affordable, and incredibly functional. By following the simple steps of lining, filling, and planting, you can turn a discarded piece of wood into a thriving ecosystem that feeds your family and beautifies your home. So, find a sturdy fence, grab a heat-treated pallet, and start your journey toward a greener, more flavorful life today. Your kitchen and your backyard will thank you.