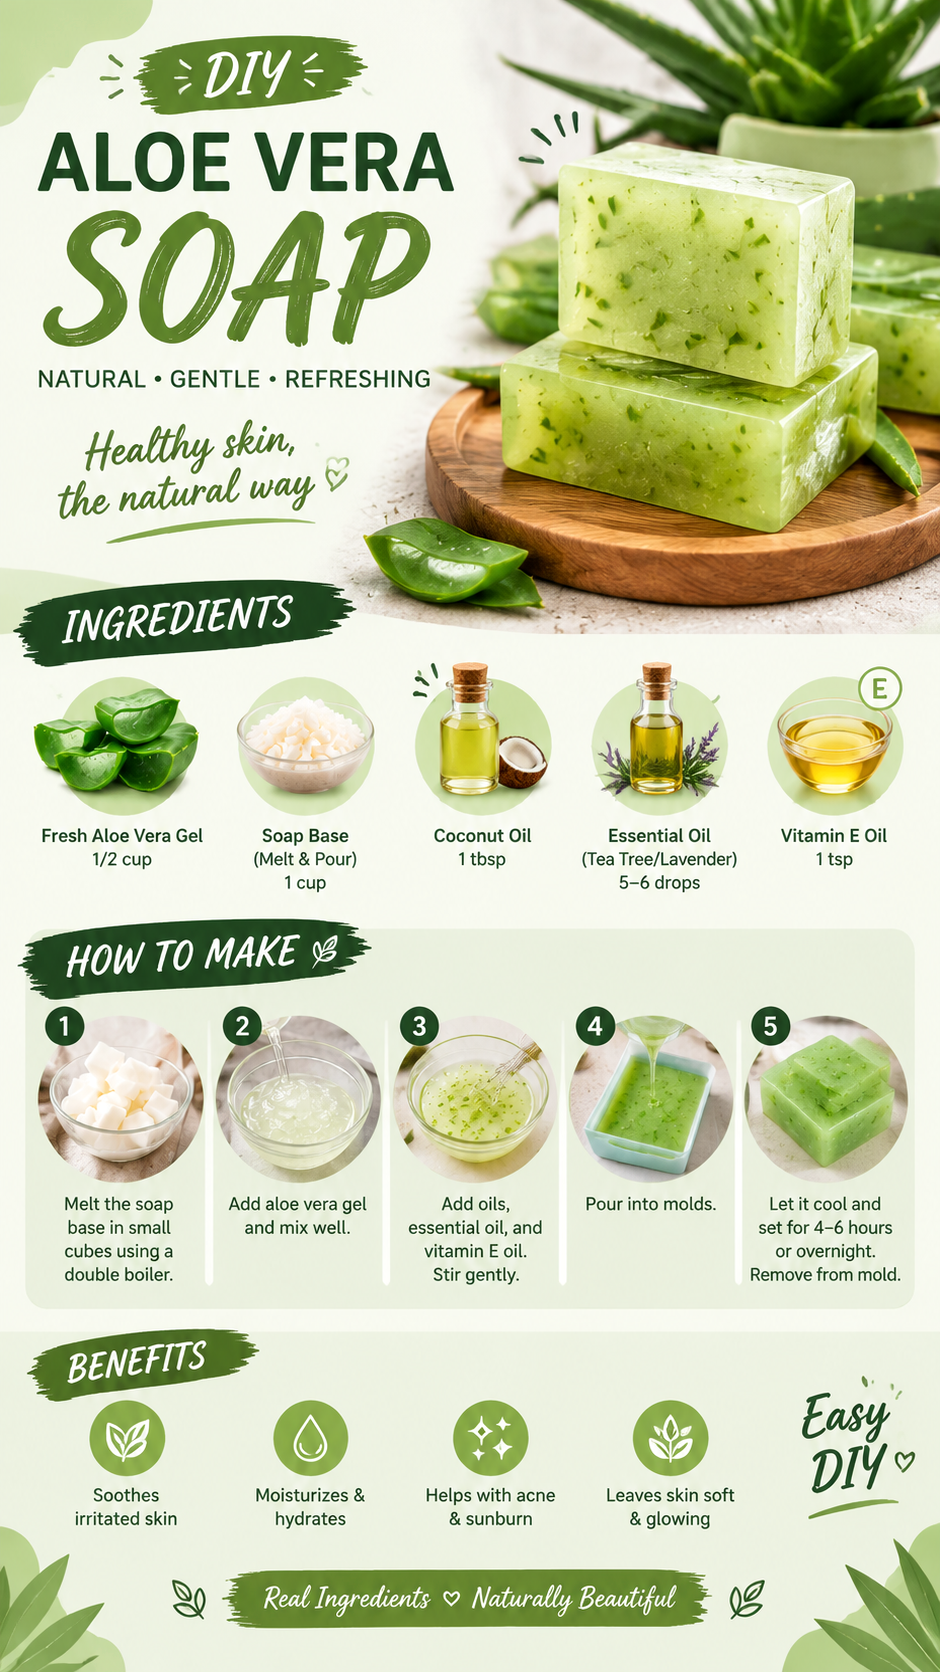
Homemade Aloe Vera Soap Recipe Natural, Soothing Moisturizing DIY Soap
Looking for a simple way to bring natural ingredients into your skincare routine? Homemade aloe vera soap is a wonderful DIY project that combines creativity, gentle cleansing, and the refreshing appeal of plant-based ingredients. With its soft green color, creamy texture, and fresh aloe vera accents, this handmade soap is as attractive as it is enjoyable to make. Whether you are new to soap making or already love creating your own beauty products, this easy aloe vera soap recipe is a great place to start.
Made with a melt-and-pour soap base, fresh aloe vera gel, coconut oil, vitamin E oil, and a few optional drops of essential oil, this recipe offers a straightforward approach to homemade soap. You do not need to handle lye or manage a complicated soap-making process because the soap base is already prepared. With a few simple tools and carefully selected ingredients, you can create attractive bars for your personal collection or thoughtful handmade gifts.
Key Takeaways
- Make beginner-friendly aloe vera soap using a melt-and-pour soap base.
- Customize your bars with aloe vera gel, coconut oil, and optional fragrance.
- Use properly prepared ingredients and suitable soap-making molds for a smooth finish.
- Choose a cosmetic-grade soap base for predictable results and convenient preparation.
- Allow the bars to cool and harden completely before removing them from their molds.
- Store finished soap in a cool, dry place to help preserve its quality.
Why Make Homemade Aloe Vera Soap?
Aloe vera is a popular ingredient in personal care products because its gel contains water and naturally occurring plant compounds. It is commonly used in products designed to leave the skin feeling refreshed and comfortable. Adding aloe vera to a suitable soap-making base creates an appealing handmade product that can become part of a simple cleansing routine.
One of the biggest advantages of making aloe vera soap at home is the opportunity to customize the ingredients, color, fragrance, shape, and texture. You can keep the recipe simple with a fragrance-free base or experiment with a suitable essential oil if you enjoy scented skincare products.
Homemade soap can also make a lovely addition to a bathroom, guest room, or handmade gift basket. The pale green color and translucent appearance of aloe vera soap create a fresh, botanical look that works beautifully with natural, minimalist, and spa-inspired decor.
Important: Homemade aloe vera soap is a cleansing product, not a proven treatment for acne, sunburn, eczema, or other skin conditions. Soap is rinsed off, and its effects differ from those of leave-on aloe vera gel. Choose ingredients suited to your skin, and discontinue use if irritation develops.
Homemade Aloe Vera Soap Ingredients
The recipe shown here uses a prepared melt-and-pour soap base, aloe vera gel, coconut oil, vitamin E oil, and optional essential oil. The proportions below provide a practical starting point for a small batch. Because adding liquids and oils can affect the firmness and lather of a soap base, keep additions modest and follow the base manufacturer’s recommendations.
What You Will Need
- 1 cup melt-and-pour soap base: Use a cosmetic-grade glycerin, shea butter, or other suitable soap base designed for remelting.
- 1 to 2 tablespoons aloe vera gel: Prefer a cosmetic-grade aloe ingredient compatible with your chosen soap base. Fresh aloe gel may introduce excess water and microorganisms.
- 1 teaspoon coconut oil: Use a small amount and confirm that your soap base can accommodate additional oils without becoming too soft.
- Vitamin E oil, optional: Add only a small, manufacturer-approved amount if compatible with the base. Vitamin E does not automatically make soap more moisturizing or preserve it against microbial growth.
- Skin-safe essential oil, optional: Tea tree or lavender may be considered if permitted by the product instructions and suitable for your intended users.
- Small aloe pieces, optional: Cosmetic-grade decorative aloe ingredients can add visual interest. Avoid large pieces of raw plant material that may spoil or interfere with the finished bar.
Equipment and Supplies
- A heat-safe glass or stainless steel container
- A microwave or double boiler
- A silicone spatula or spoon
- A kitchen scale or measuring tools
- Silicone soap molds
- A clean, dry work surface
- Optional cosmetic colorant approved for soap making
Before you begin, clean your equipment and allow it to dry completely. Use a dedicated container and utensils for cosmetic projects whenever possible, and avoid equipment that could react with the ingredients.
How to Make Aloe Vera Soap Step by Step
The melt-and-pour method is convenient because the soap base has already undergone the main soap-making process. Your job is to melt it gently, incorporate compatible additives, pour the mixture into molds, and let the bars harden.
Step 1: Cut the Soap Base Into Small Cubes
Remove the soap base from its packaging and cut it into small, evenly sized cubes using a clean knife and cutting board. Smaller pieces melt more consistently than one large block, making it easier to control the temperature.
Place the cubes in a heat-safe container. Avoid adding the aloe vera gel or oils at this stage unless the manufacturer’s directions specifically recommend doing so.
Step 2: Melt the Soap Base Gently
Use a double boiler or microwave to melt the soap base. For a double boiler, place the heat-safe container over gently simmering water without allowing the container to touch the water. Stir occasionally as the cubes soften.
If using a microwave, heat the soap in short intervals, stirring between each one. Stop as soon as the base is melted and smooth. Overheating can cause bubbles, discoloration, or an unpleasant texture.
Always use appropriate heat protection when handling the container. Melted soap can become very hot, even when it looks relatively cool.
Step 3: Add the Aloe Vera Ingredient
Once the base has melted, allow it to cool slightly within the temperature range recommended by the manufacturer. Add a small, compatible amount of aloe vera ingredient and stir gently until evenly distributed.
Aloe vera can give a soap recipe its botanical appeal, but adding fresh gel directly is not always the best option. Fresh aloe contains water and may introduce microorganisms, while extra liquid can soften the soap or affect its ability to set properly.
For a more predictable result, choose a soap base specifically formulated with aloe vera or use a cosmetic-grade aloe ingredient that the manufacturer confirms is suitable for melt-and-pour soap. If you are experimenting with a new combination, make a small test batch first.
Step 4: Mix in the Oils Carefully
Add the small, recommended amount of coconut oil and any compatible vitamin E ingredient. If the coconut oil is solid, melt it gently before incorporating it into the soap mixture. Stir slowly to distribute the ingredients without creating unnecessary bubbles.
Essential oil is optional. If you decide to use it, select a product intended for cosmetic use and follow its skin-safety guidance and the soap base manufacturer’s usage limits. Fragrance-free soap is a good alternative for people who prefer fewer ingredients or find scented products irritating.
Pro Tip: More oil does not necessarily mean better soap. Excess added oil can reduce lather, soften the bars, and leave an unwanted residue. Keep the formula conservative, and test the finished soap before making a larger batch.
Step 5: Pour the Mixture Into Soap Molds
Place clean silicone molds on a level, heat-resistant surface. Pour the mixture slowly into each cavity, taking care not to overfill it. Silicone molds are particularly useful because the finished bars are generally easier to release than they are from rigid containers.
If small bubbles appear on the surface, follow the soap base manufacturer’s instructions for removing them. Some soap makers use a light mist of cosmetic-grade isopropyl alcohol, but this is optional and should be handled carefully, away from flames and other ignition sources.
You can choose square molds for a classic handmade appearance or experiment with botanical shapes for decorative gifts. A simple rectangular mold is ideal when you want a clean, practical bar for everyday use.
Step 6: Let the Soap Cool and Harden
Leave the filled molds undisturbed until the soap is fully cool and firm. Depending on the size of the bars, the type of base, and the room temperature, this may take several hours. Overnight is a convenient option if you are not in a hurry.
Once the bars have hardened, gently flex the silicone mold and release each bar. If a bar feels soft or bends easily, give it more time to cool. Avoid placing warm soap in a sealed container because trapped moisture can affect the surface.
Unlike traditional cold-process soap, a properly prepared melt-and-pour bar does not need weeks of curing. It should, however, be completely cool and firm before handling, wrapping, or use.
Benefits and Appeal of Aloe Vera Soap
Aloe vera soap is popular among DIY skincare enthusiasts because it combines a recognizable botanical ingredient with an accessible craft project. Its appeal comes from its simple appearance, customization options, and the satisfaction of making something useful at home.
1. A Fresh, Botanical Look
The pale green color associated with aloe vera creates a clean, nature-inspired appearance. A transparent or translucent base can give the bars a glass-like finish, while an opaque base creates a softer, creamy look. The final color depends on the base and any colorants you choose.
If you prefer a minimalist style, leave the soap uncolored. If you want a stronger green shade, use a cosmetic colorant specifically approved for soap. Start with a tiny amount and test it before coloring an entire batch.
2. A Customizable Cleansing Bar
Making soap at home lets you select a base and decide whether to include fragrance, color, or additional decorative ingredients. You can create a simple unscented bar or prepare different versions for gifts and personal use.
Keep in mind that the base does most of the cleansing work. The added ingredients should be compatible with it, and customization should not compromise the bar’s stability or safety.
3. A Fun Beginner DIY Project
Melt-and-pour soap making is approachable because it avoids the need to handle sodium hydroxide during the main soap-making reaction. It is still important to work carefully with hot ingredients, follow the product instructions, and keep children away from the heated mixture.
This project can also be adapted to different occasions. Create simple bars for a guest bathroom, package a few as birthday gifts, or make a coordinated set with matching colors and molds.
4. An Opportunity to Build a Simple Routine
Aloe vera soap can be one part of a basic cleansing routine. Choose a base that suits your skin, use lukewarm water, and avoid excessive scrubbing. If your skin feels tight or dry after washing, consider a gentle cleanser with a formula designed for your skin type and apply a suitable moisturizer afterward.
Although aloe vera is widely used in skincare, its presence does not guarantee that a soap will moisturize the skin or prevent breakouts. The finished product’s cleansing properties depend on the base, and rinse-off soap is not equivalent to a leave-on aloe vera product.
Why This Matters
A successful handmade soap depends on the balance of its ingredients, not just the number of natural additions. Choosing a suitable base and limiting extra liquids helps produce a firmer, more consistent bar. Natural ingredients can still cause irritation or spoilage, so careful selection and sensible handling matter.
Tips for Making Better Homemade Aloe Vera Soap
Choose the Right Soap Base
The soap base determines much of the finished bar’s appearance, lather, hardness, and feel. A clear glycerin base can produce translucent green soap, while an opaque base may create a creamy, pastel finish. Read the ingredient list and usage directions before purchasing.
If you want aloe vera to be a central feature, look for a base already formulated with aloe. This is often more reliable than adding large amounts of fresh plant gel to a product that was not designed to accommodate it.
Avoid Overheating
Heat the soap base slowly and stop as soon as it melts. Repeated or excessive heating may change the texture and can lead to bubbles or discoloration. If your microwave has a high power setting, use shorter intervals and stir between them.
Keep Decorative Additions Modest
Small amounts of suitable decorative ingredients can make a bar look special, but too many additions can affect its texture. Raw aloe pieces may discolor or spoil, especially when moisture is present. For a more reliable result, use ingredients designed for cosmetic formulations and avoid unnecessary plant material.
Test Before Making a Large Batch
If you are trying a new aloe ingredient, essential oil, or combination of additives, make a small test batch first. Check whether the bar hardens correctly, maintains a pleasant texture, and performs as expected during use.
Testing also gives you a chance to refine the color, scent, and mold design before committing more ingredients to the project.
Common Aloe Vera Soap-Making Mistakes to Avoid
Adding Too Much Fresh Aloe Gel
Fresh aloe gel may seem like the most natural choice, but it can add more water and organic material than a melt-and-pour base can safely accommodate. This may soften the bar, interfere with setting, or increase the risk of spoilage.
Use a base formulated with aloe vera or a compatible cosmetic ingredient instead of assuming that fresh gel can be substituted without changing the recipe.
Using Too Much Coconut Oil
Coconut oil is popular in soap making, but adding it to an already prepared base changes the formula. Excess oil can interfere with lather and leave the bar soft or greasy. Measure carefully and stay within the manufacturer’s recommended additive limits.
Using Fragrance Without Checking Its Suitability
Not every essential oil or fragrance is appropriate for skin-contact products. Some can cause irritation or allergic reactions, and their safe usage levels vary. Use only products intended for cosmetic use and follow their specific instructions. If you are unsure, leave the fragrance out.
Wrapping the Bars Too Soon
Make sure the bars have cooled and hardened completely before packaging them. Depending on the soap base and surrounding humidity, moisture may form on the surface of glycerin-rich soap. Suitable packaging can help protect the bars from excess moisture and dust.
How to Store Homemade Aloe Vera Soap
Proper storage helps maintain the appearance and quality of your finished bars. Keep the soap in a cool, dry location away from direct sunlight, heat sources, and excess humidity. Allow the bars to dry between uses rather than leaving them in a pool of water.
- For everyday use: Place the soap on a draining soap dish that allows water to escape.
- For storage: Keep unused bars dry and protected from dust and moisture.
- For gifting: Wrap completely cooled bars in suitable packaging that protects them from humidity.
- For experimental batches: Label the ingredients and preparation date so you can keep track of the formula.
Because recipes and ingredients vary, do not assume a homemade soap has a particular shelf life. If a bar develops an unusual odor, visible growth, or an unexpected change in texture, stop using it and discard it. Homemade products containing fresh plant material or additional water deserve particular caution.
Is Aloe Vera Soap Suitable for Every Skin Type?
Aloe vera soap may be enjoyable for some people, but no single soap is ideal for everyone. Skin can react to fragrance, essential oils, plant ingredients, and the cleansing agents in the base. Even ingredients described as natural can cause sensitivity.
If you have dry or sensitive skin, consider an unscented base designed for gentle cleansing. Avoid abrasive additives and discontinue use if you notice redness, itching, burning, or other signs of irritation. People with known allergies to any ingredient should avoid products containing it.
If you have a persistent skin condition, open wounds, or a significant reaction to a product, consult a qualified healthcare professional rather than relying on homemade soap as a treatment.
Creative Ways to Customize Your Aloe Vera Soap
Once you are comfortable with the basic method, you can personalize your bars without making the recipe complicated. Start with one variation at a time so you can see how each change affects the finished product.
Try Different Mold Shapes
Square and rectangular molds give soap a classic, simple finish. Leaf-shaped molds suit a botanical theme, while small individual molds are convenient for guest bathrooms and gift sets. Choose molds that are heat-safe and designed for soap making.
Experiment With Natural-Looking Colors
A soft green shade complements the aloe vera theme, but color is optional. Use cosmetic colorants suitable for soap and add them sparingly. Some natural colorants may fade or change during storage, so test them before preparing a larger batch.
Create a Simple Gift Set
Arrange several finished bars in a small gift box with a clean label and a short ingredient list. A coordinated set of botanical-inspired soaps can make a thoughtful gift for birthdays, holidays, or anyone who enjoys handmade crafts.
Describe the ingredients accurately and avoid claiming that the soap cures acne, heals burns, or provides guaranteed skincare results. If you give soap to someone else, make sure the ingredient information is available so they can check for sensitivities.
Quick Points: Homemade Aloe Vera Soap at a Glance
- Method: Melt-and-pour soap making.
- Main ingredient: A suitable prepared soap base.
- Botanical addition: Compatible aloe vera ingredient.
- Customization: Optional cosmetic oils, fragrance, and colorants.
- Setting time: Until completely cool and firm, often several hours.
- Storage: Keep finished bars dry, cool, and protected from excess humidity.
Conclusion: Enjoy Making Your Own Aloe Vera Soap
Homemade aloe vera soap is a satisfying DIY project that combines a fresh botanical look with a straightforward soap-making method. By starting with a suitable melt-and-pour base, choosing compatible ingredients, and following a few careful steps, you can create attractive bars without needing an elaborate setup.
The best results come from keeping the formula simple, measuring added oils carefully, and avoiding excessive amounts of fresh aloe gel or other ingredients that may affect the soap’s stability. Take your time while melting, mix gently, and allow each bar to harden completely before removing it from the mold.
Whether you prefer a classic green bar, a fragrance-free option, or a decorative handmade gift, this aloe vera soap recipe offers plenty of room for creativity. Begin with a small batch, make adjustments gradually, and enjoy the process of creating something useful with your own hands.
Save this homemade aloe vera soap recipe for your next DIY skincare project, gather your supplies, and create a simple botanical-inspired bar that fits your personal style.
Tags
Homemade Aloe Vera Soap
DIY Soap Making
Aloe Vera Skincare
Melt and Pour Soap
Natural Soap Recipe
Handmade Beauty
DIY Skincare
Botanical Soap